Implementing a Headless E-commerce Site Search API with Node.js


Most users enter an online store with some idea of what they want to purchase. And 43% of the time, the first thing they’ll look for is the search box.
The experience that your website’s search engine provides is influential in determining whether a user will make the purchase or not. It’s not just about showing the result for the query—it also needs to make suggestions based on your understanding of your users while performing the search query quickly.
In this tutorial, we’ll use a sample headless e-commerce website and show how to build a custom search solution with Sajari’s Site Search API for a great user experience.
What is headless e-commerce?
Headless e-commerce is decoupling the frontend from the backend. The frontend and backend can each be different frameworks, even on different servers, which can make your architecture more scalable. The frontend communicates with the backend using an API to retrieve and view the necessary data.
What is a custom search engine?
Good search and discovery can be one of the biggest differentiators for e-commerce brands and retailers to provide a great website user experience. Not only do customers like using site search, they’re two to three times more likely to convert than visitors that only browse.
Search functionality can include features such as spell checking, filters and facets, natural language processing (NLP), and more. Site owners can go even further to configure and customize search—for example, adding a personalization layer to deliver custom results for each user—but have typically been stymied by the complexity of search most APIs.
Sajari offers a unique and powerful search experience. It consists of custom search APIs for working with any headless commerce solution as well as easy-to-use configuration settings (known as pipelines). More on this below.
Setting up a headless e-commerce website
For this custom search tutorial, we will use this sample headless e-commerce website built with Node.js and Express. Let’s set it up before adding the site search engine functionality.
Prerequisites
This tutorial requires installing Node.js and NPM. (If Node is installed, then so is NPM).
Website setup
First, clone the GitHub repository:
Once the repository is cloned, change to the directory:
Then run npm install to install the dependencies needed to run the website, and in your terminal run npm start.
If you see no errors, you’ll see Running server on 7000 among the messages. Go to http://localhost:7000, and you’ll see the website running. There will be tabs at the top for Products, Cart, and more.
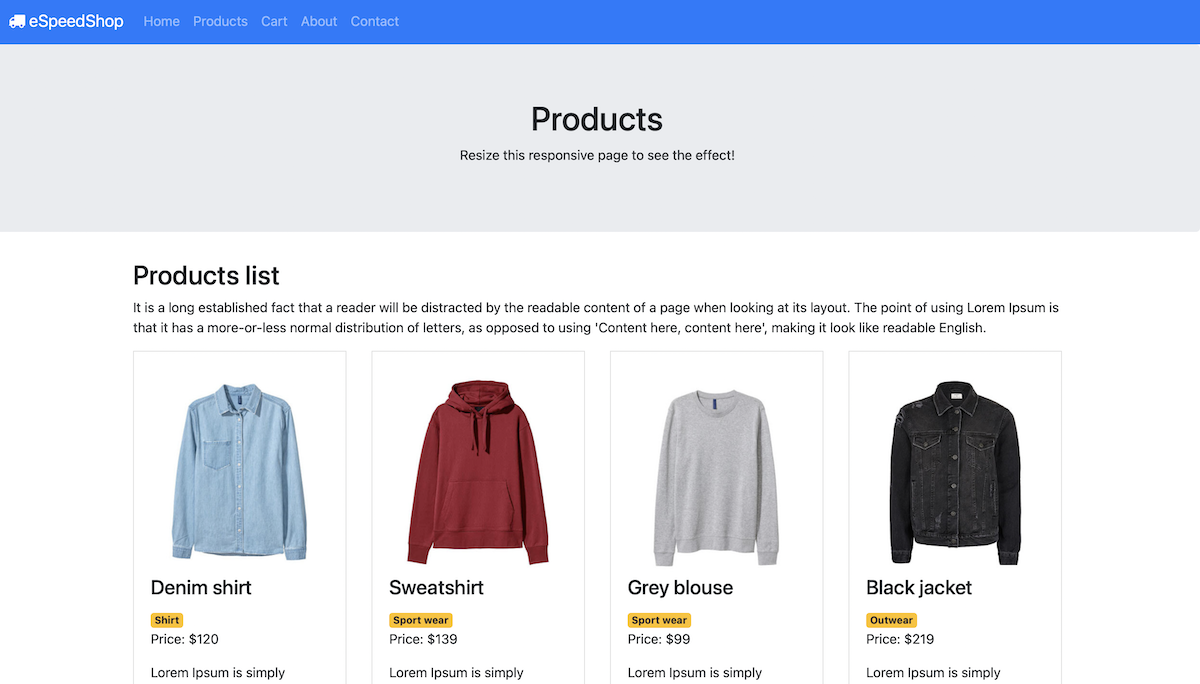
As you can see, the site doesn’t have search functionality at the moment. We’ll be adding a search experience using Sajari next.
Understanding Sajari API
Sajari makes use of collections—you can think of them as tables in a database. These collections have records, (equivalent to rows in tables), and inside those records there are fields (equivalent to columns). These fields will have fields that are searchable, for example, title of a product or its description. Collections store the records that you want to search through.
To index records and perform queries, Sajari uses pipelines. Pipelines are sets of instructions written in a YAML file, either with steps to index records or steps to search through the indexed records and perform queries. So, there are two types of pipelines:
- A record pipeline performs the indexing of records
- A query pipeline performs the search queries
Before you can use Sajari’s API, you need to create a collection—say, a products collection—then create a record pipeline and a query pipeline. You’ll use these to index records and perform queries respectively.
Setting up Sajari
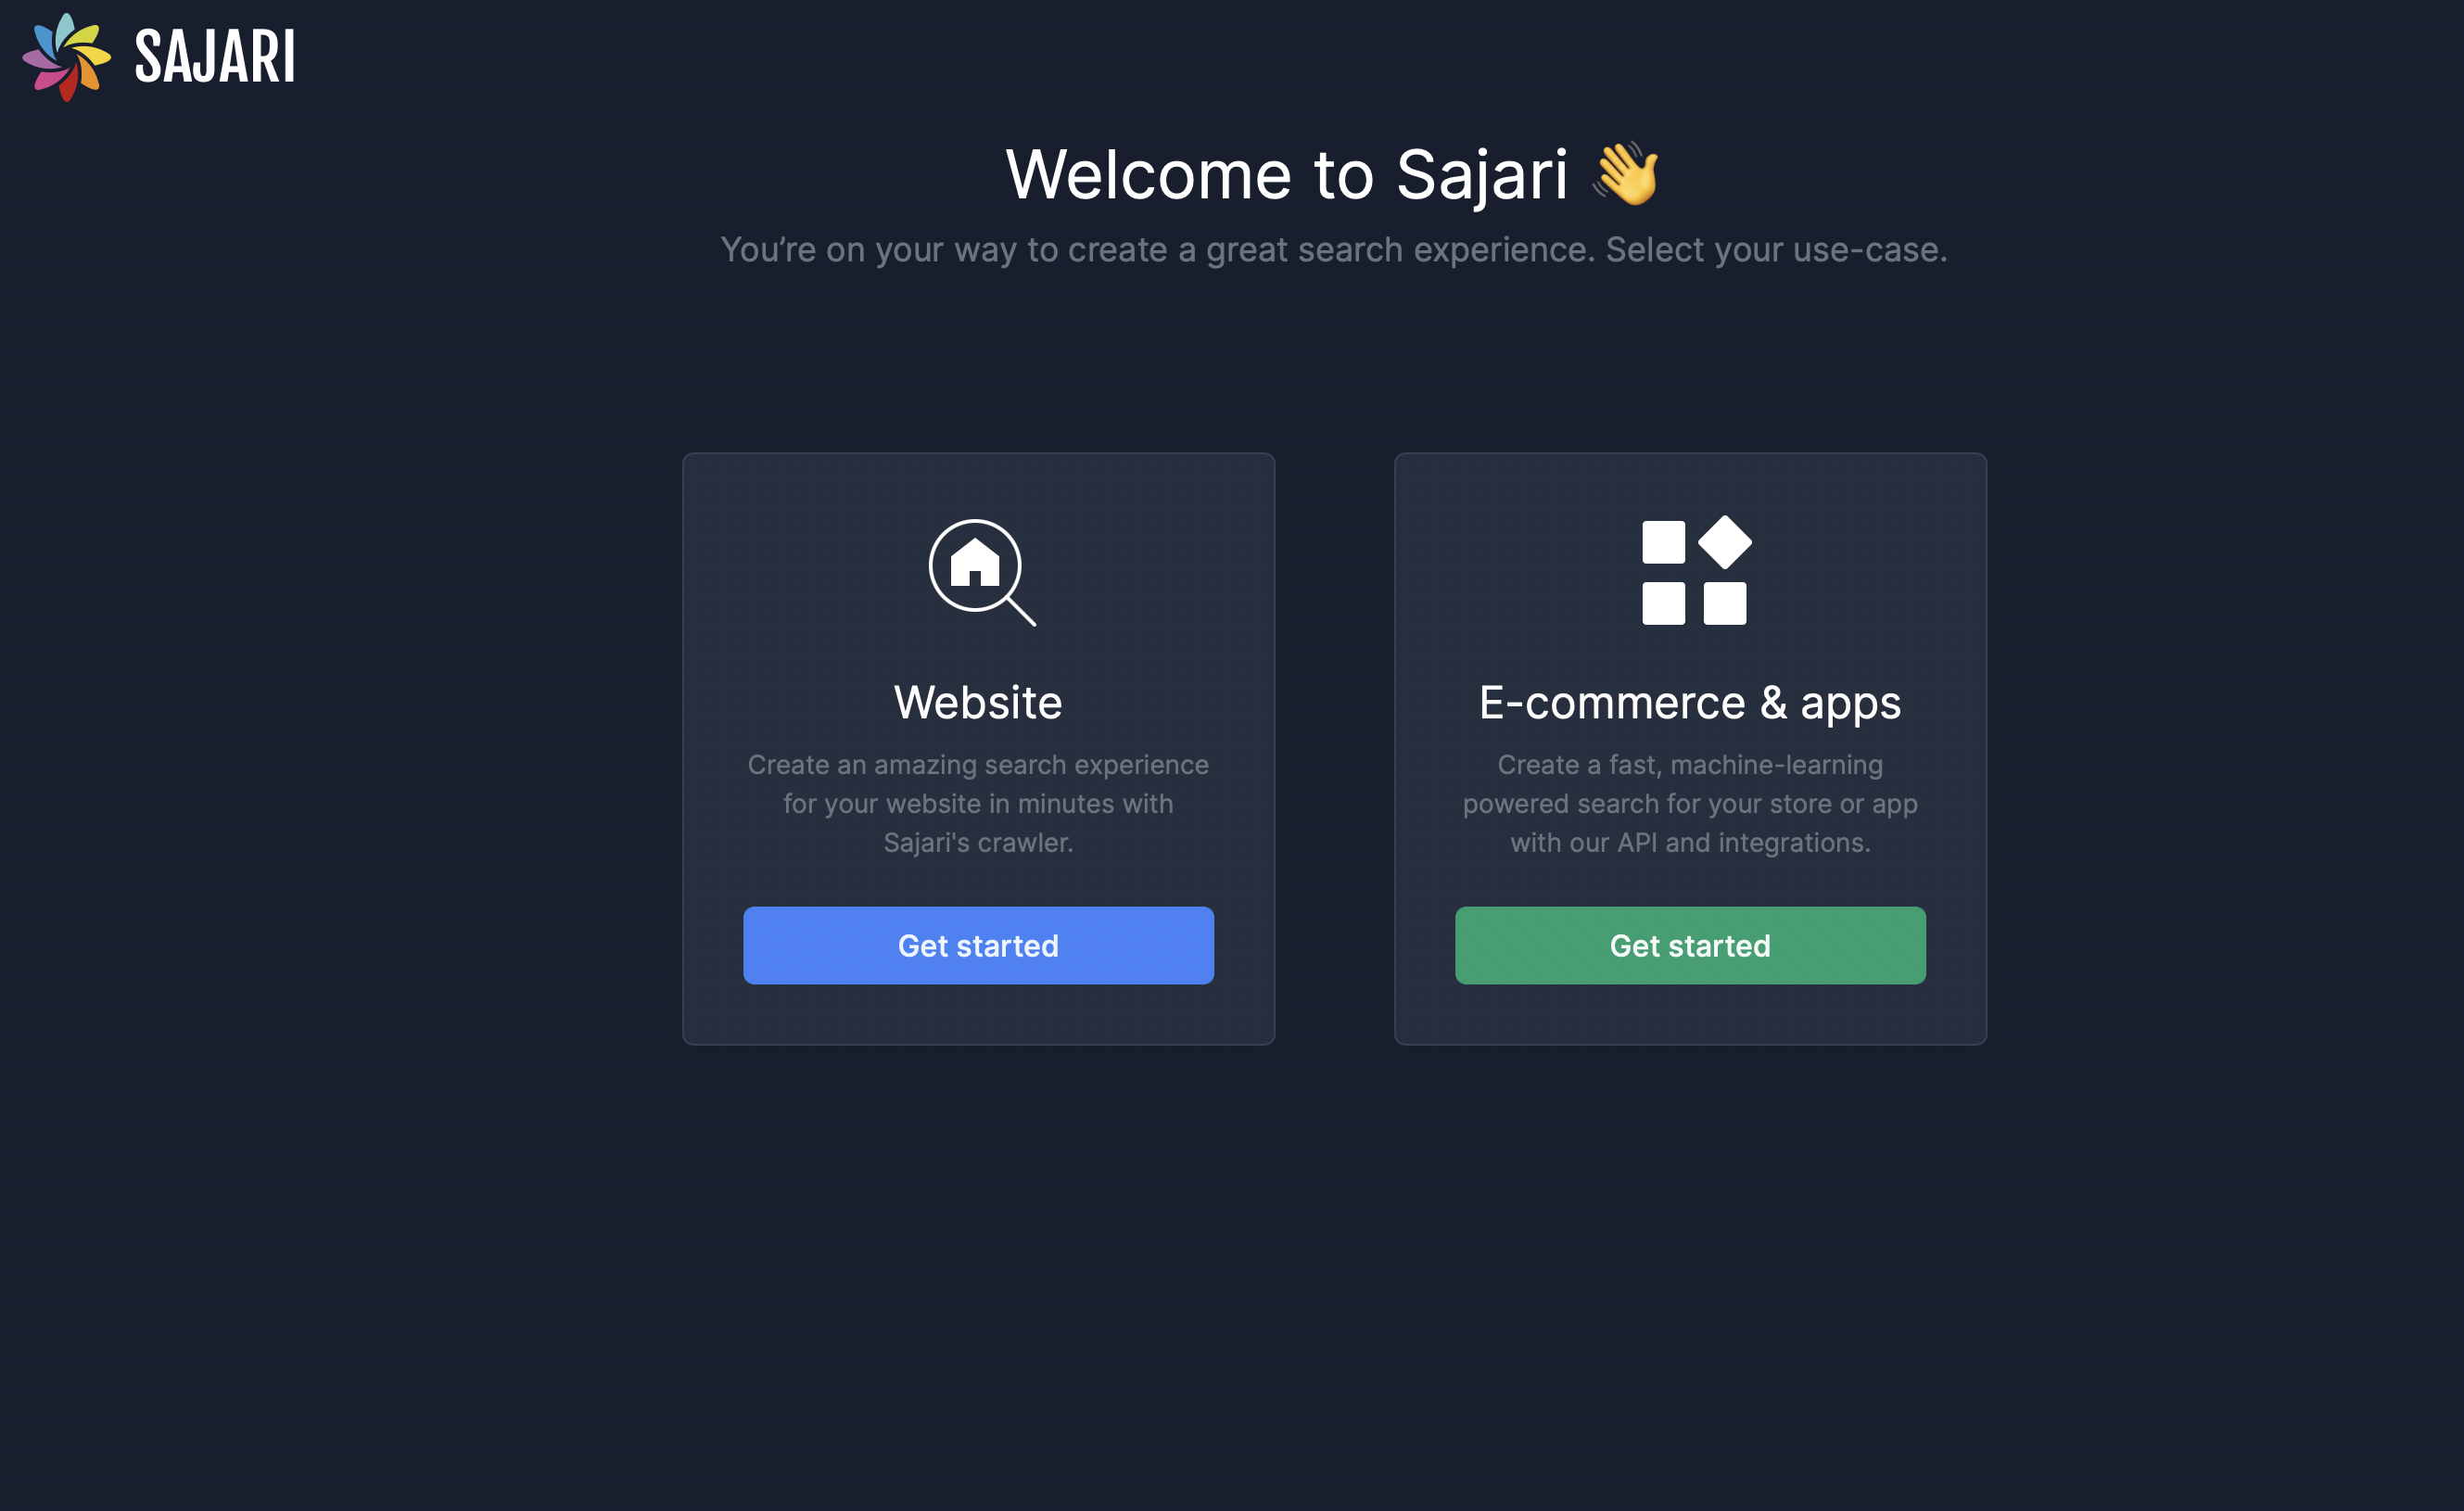
You’ll also need to create a free account on Sajari. You’ll then be asked to select a use case for your project. Choose E-commerce & apps.
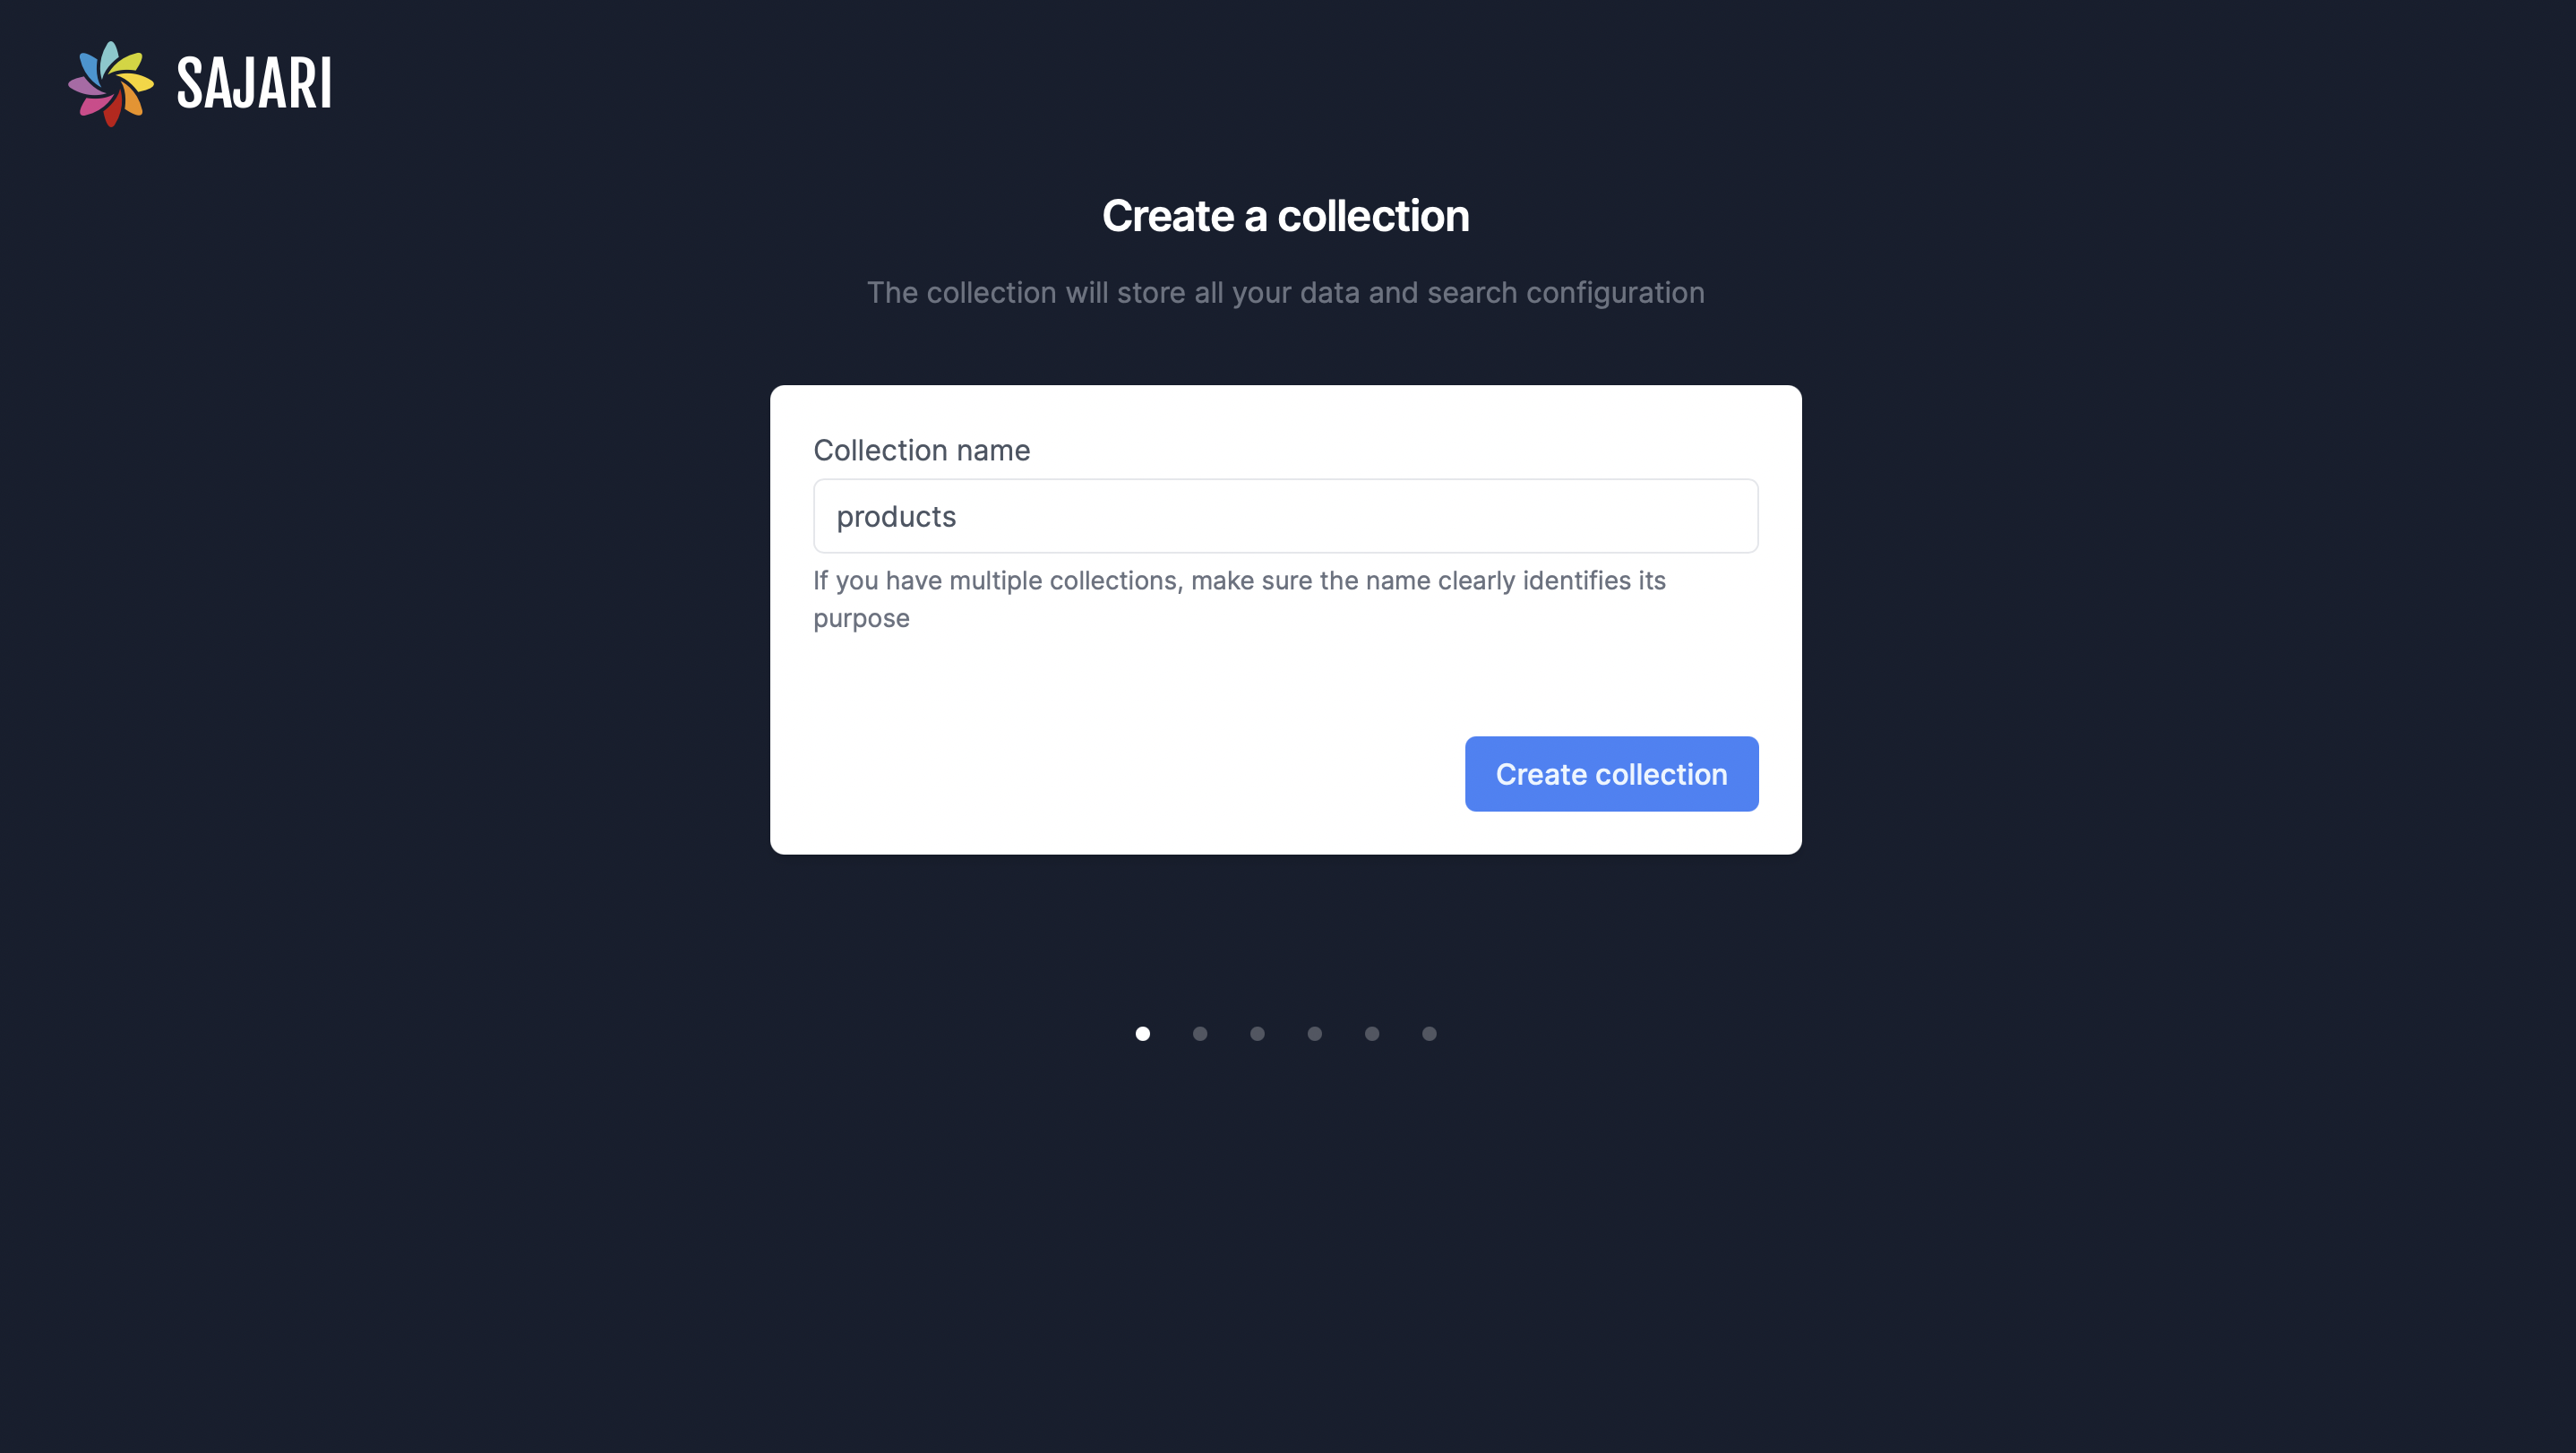
Next, you’ll be asked to create your first collection. Name the collection products.
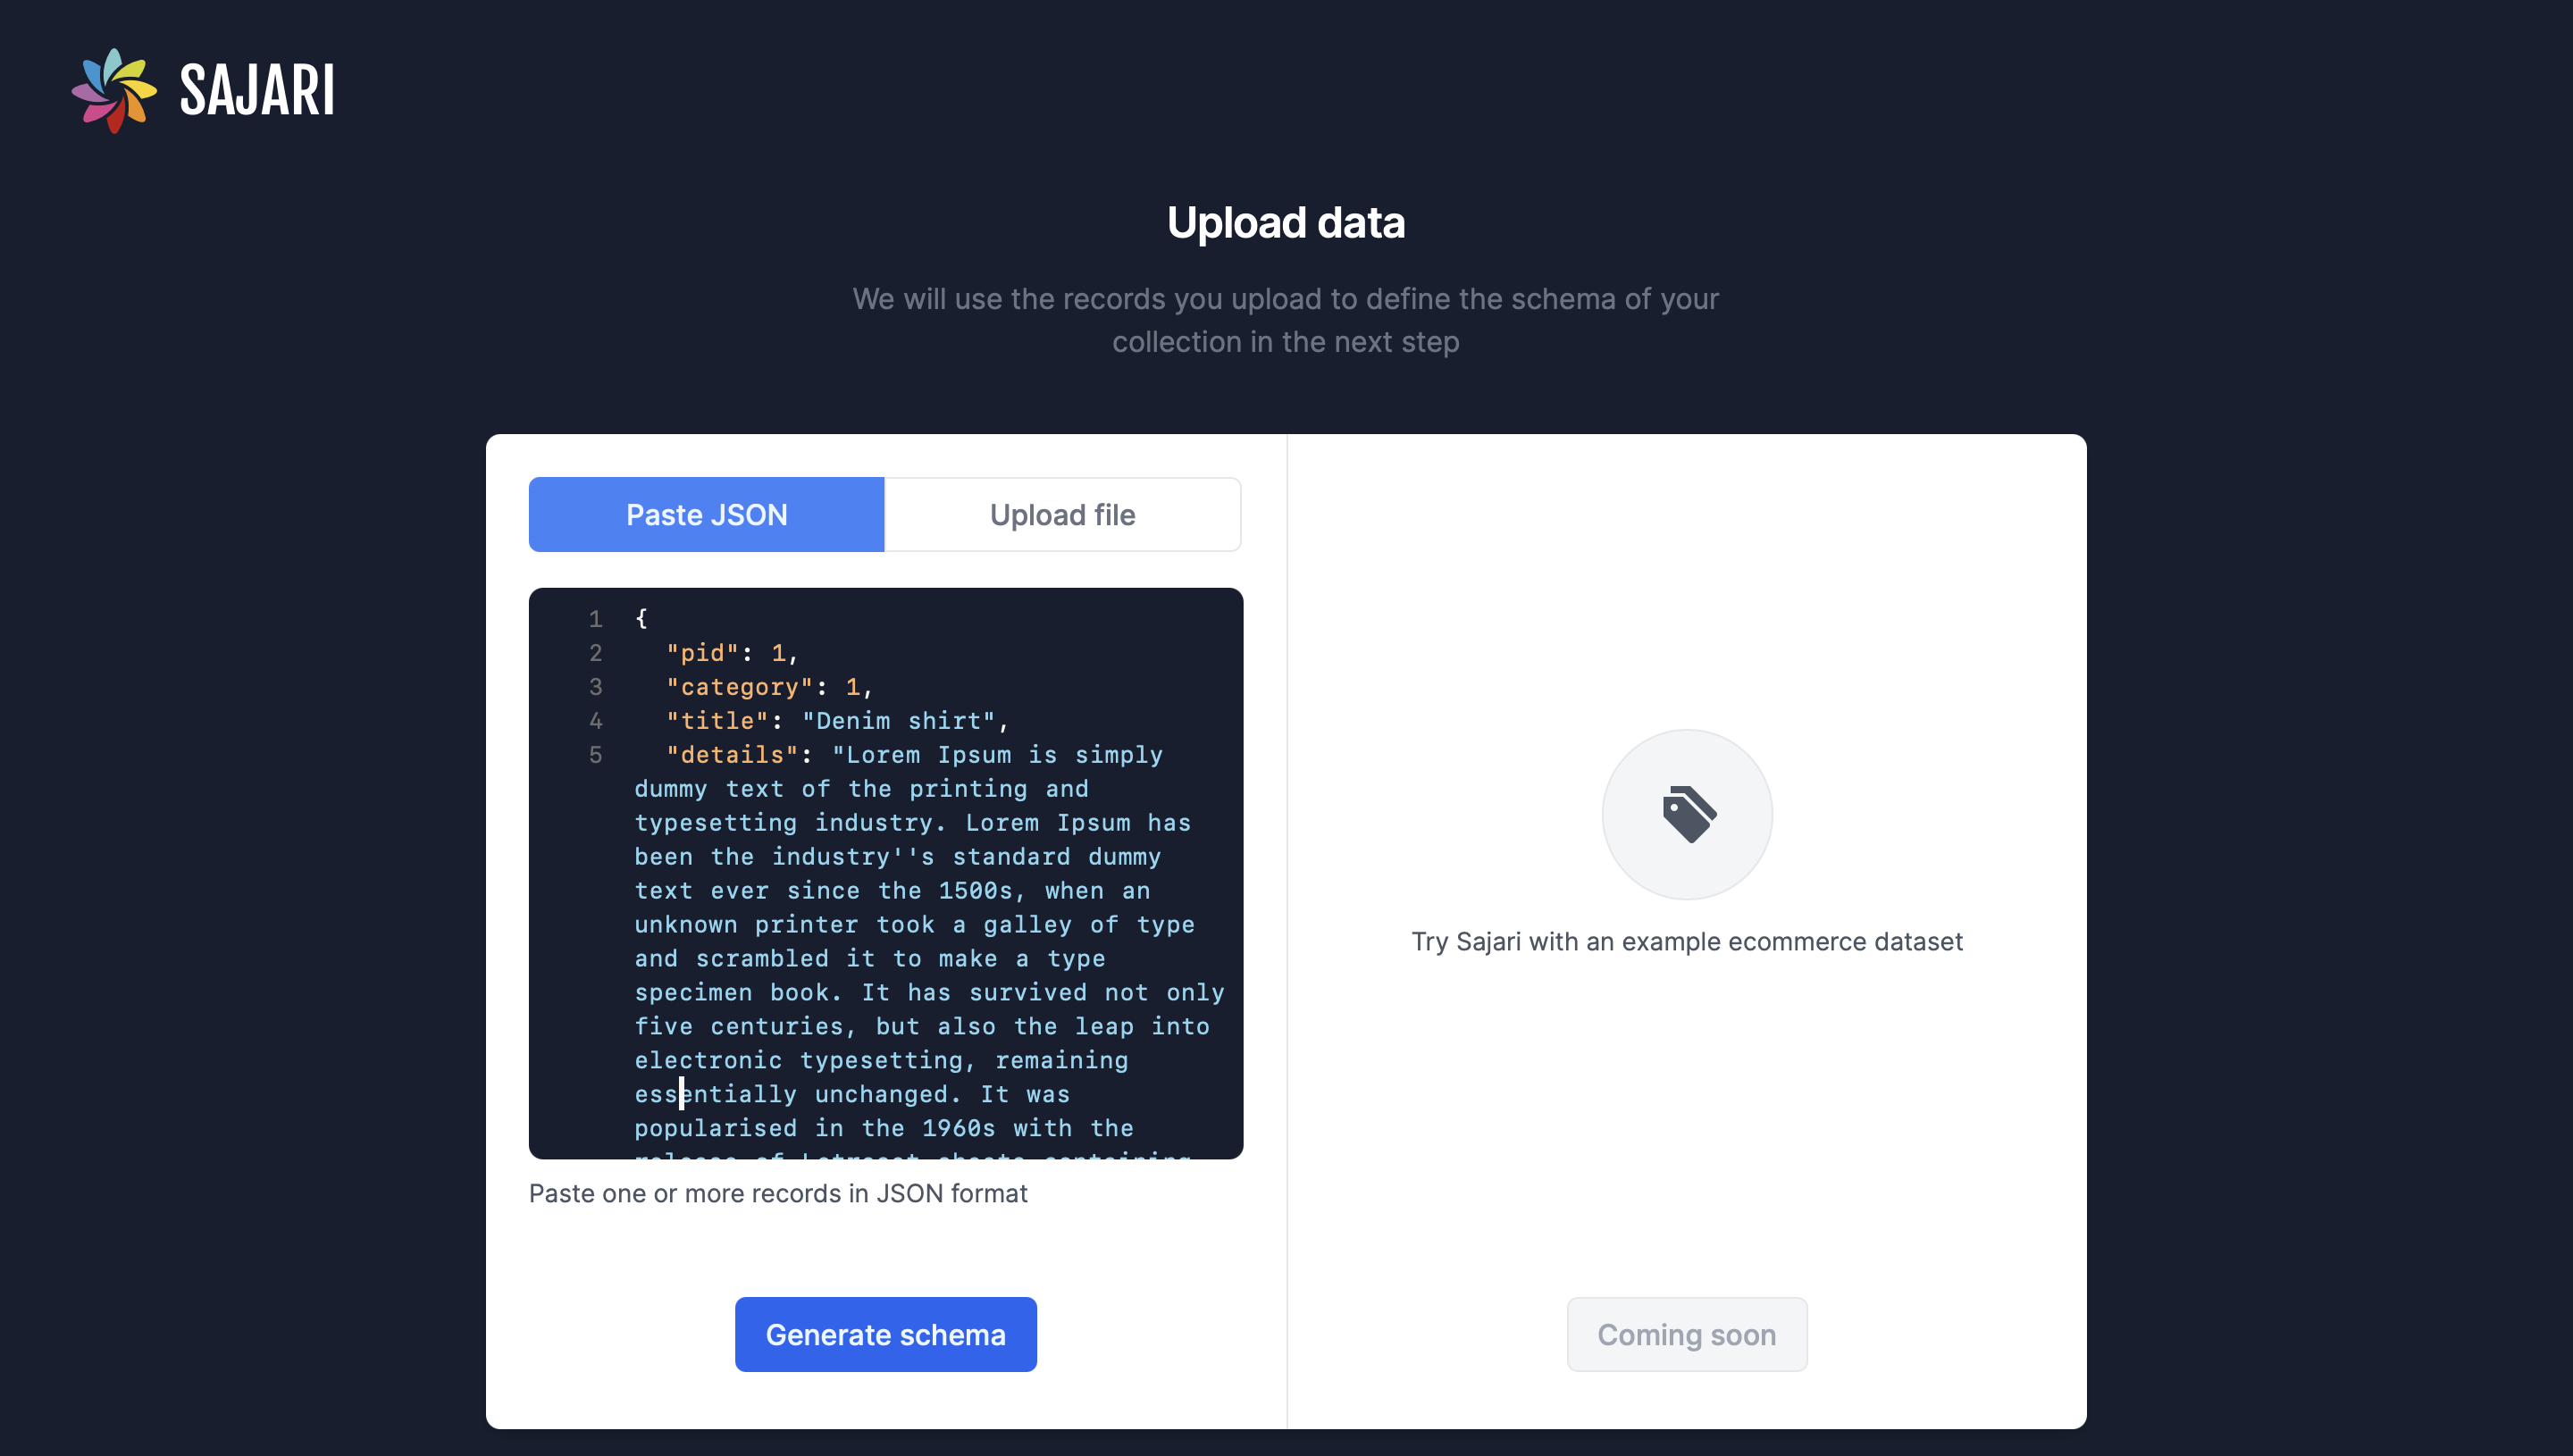
You’ll be asked to either upload a JSON file or paste a JSON object or array of a set of records in the collection. Sajari uses the records to define the fields of the collection. As your database is small, use the following JSON, which resembles one of the products in your database:
Paste it and click Generate Schema.
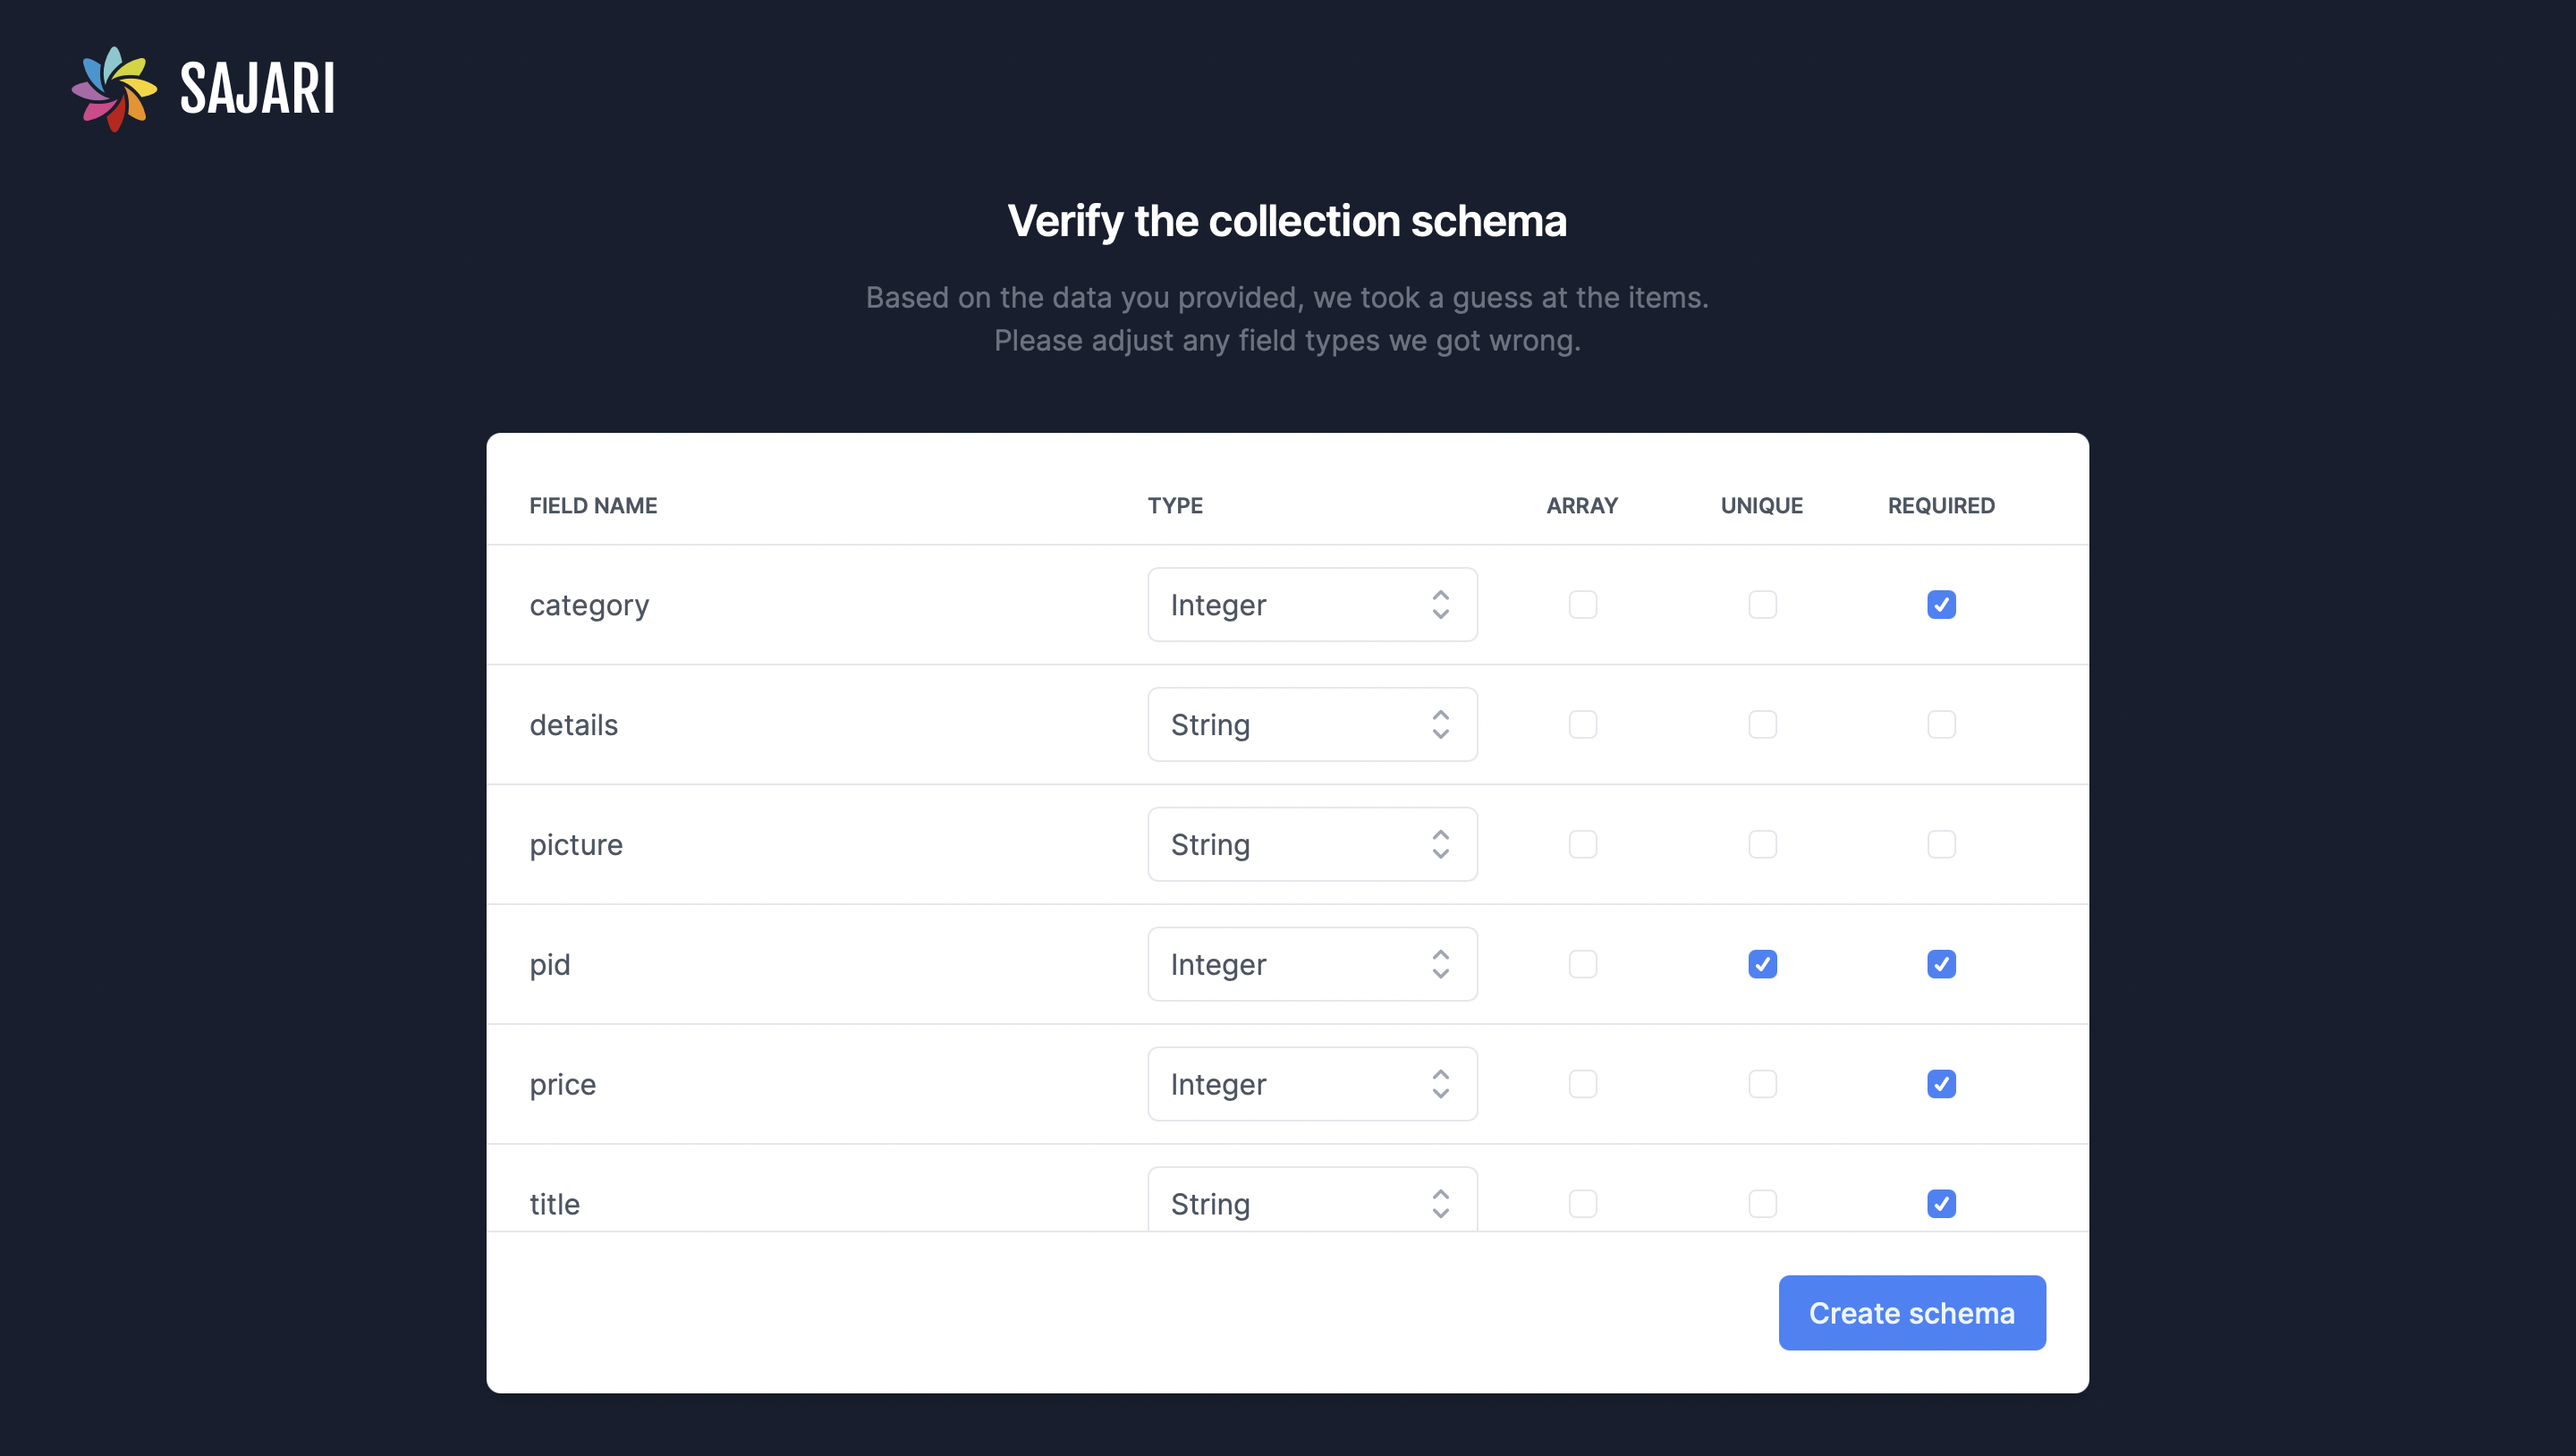
Sajari will then define the schema with the fields in the record you pasted. It will show you the fields and ask you to check which are required and which are unique.
Check Required for category, pid, price, and title, and check Unique for pid. Then, click Create Schema.
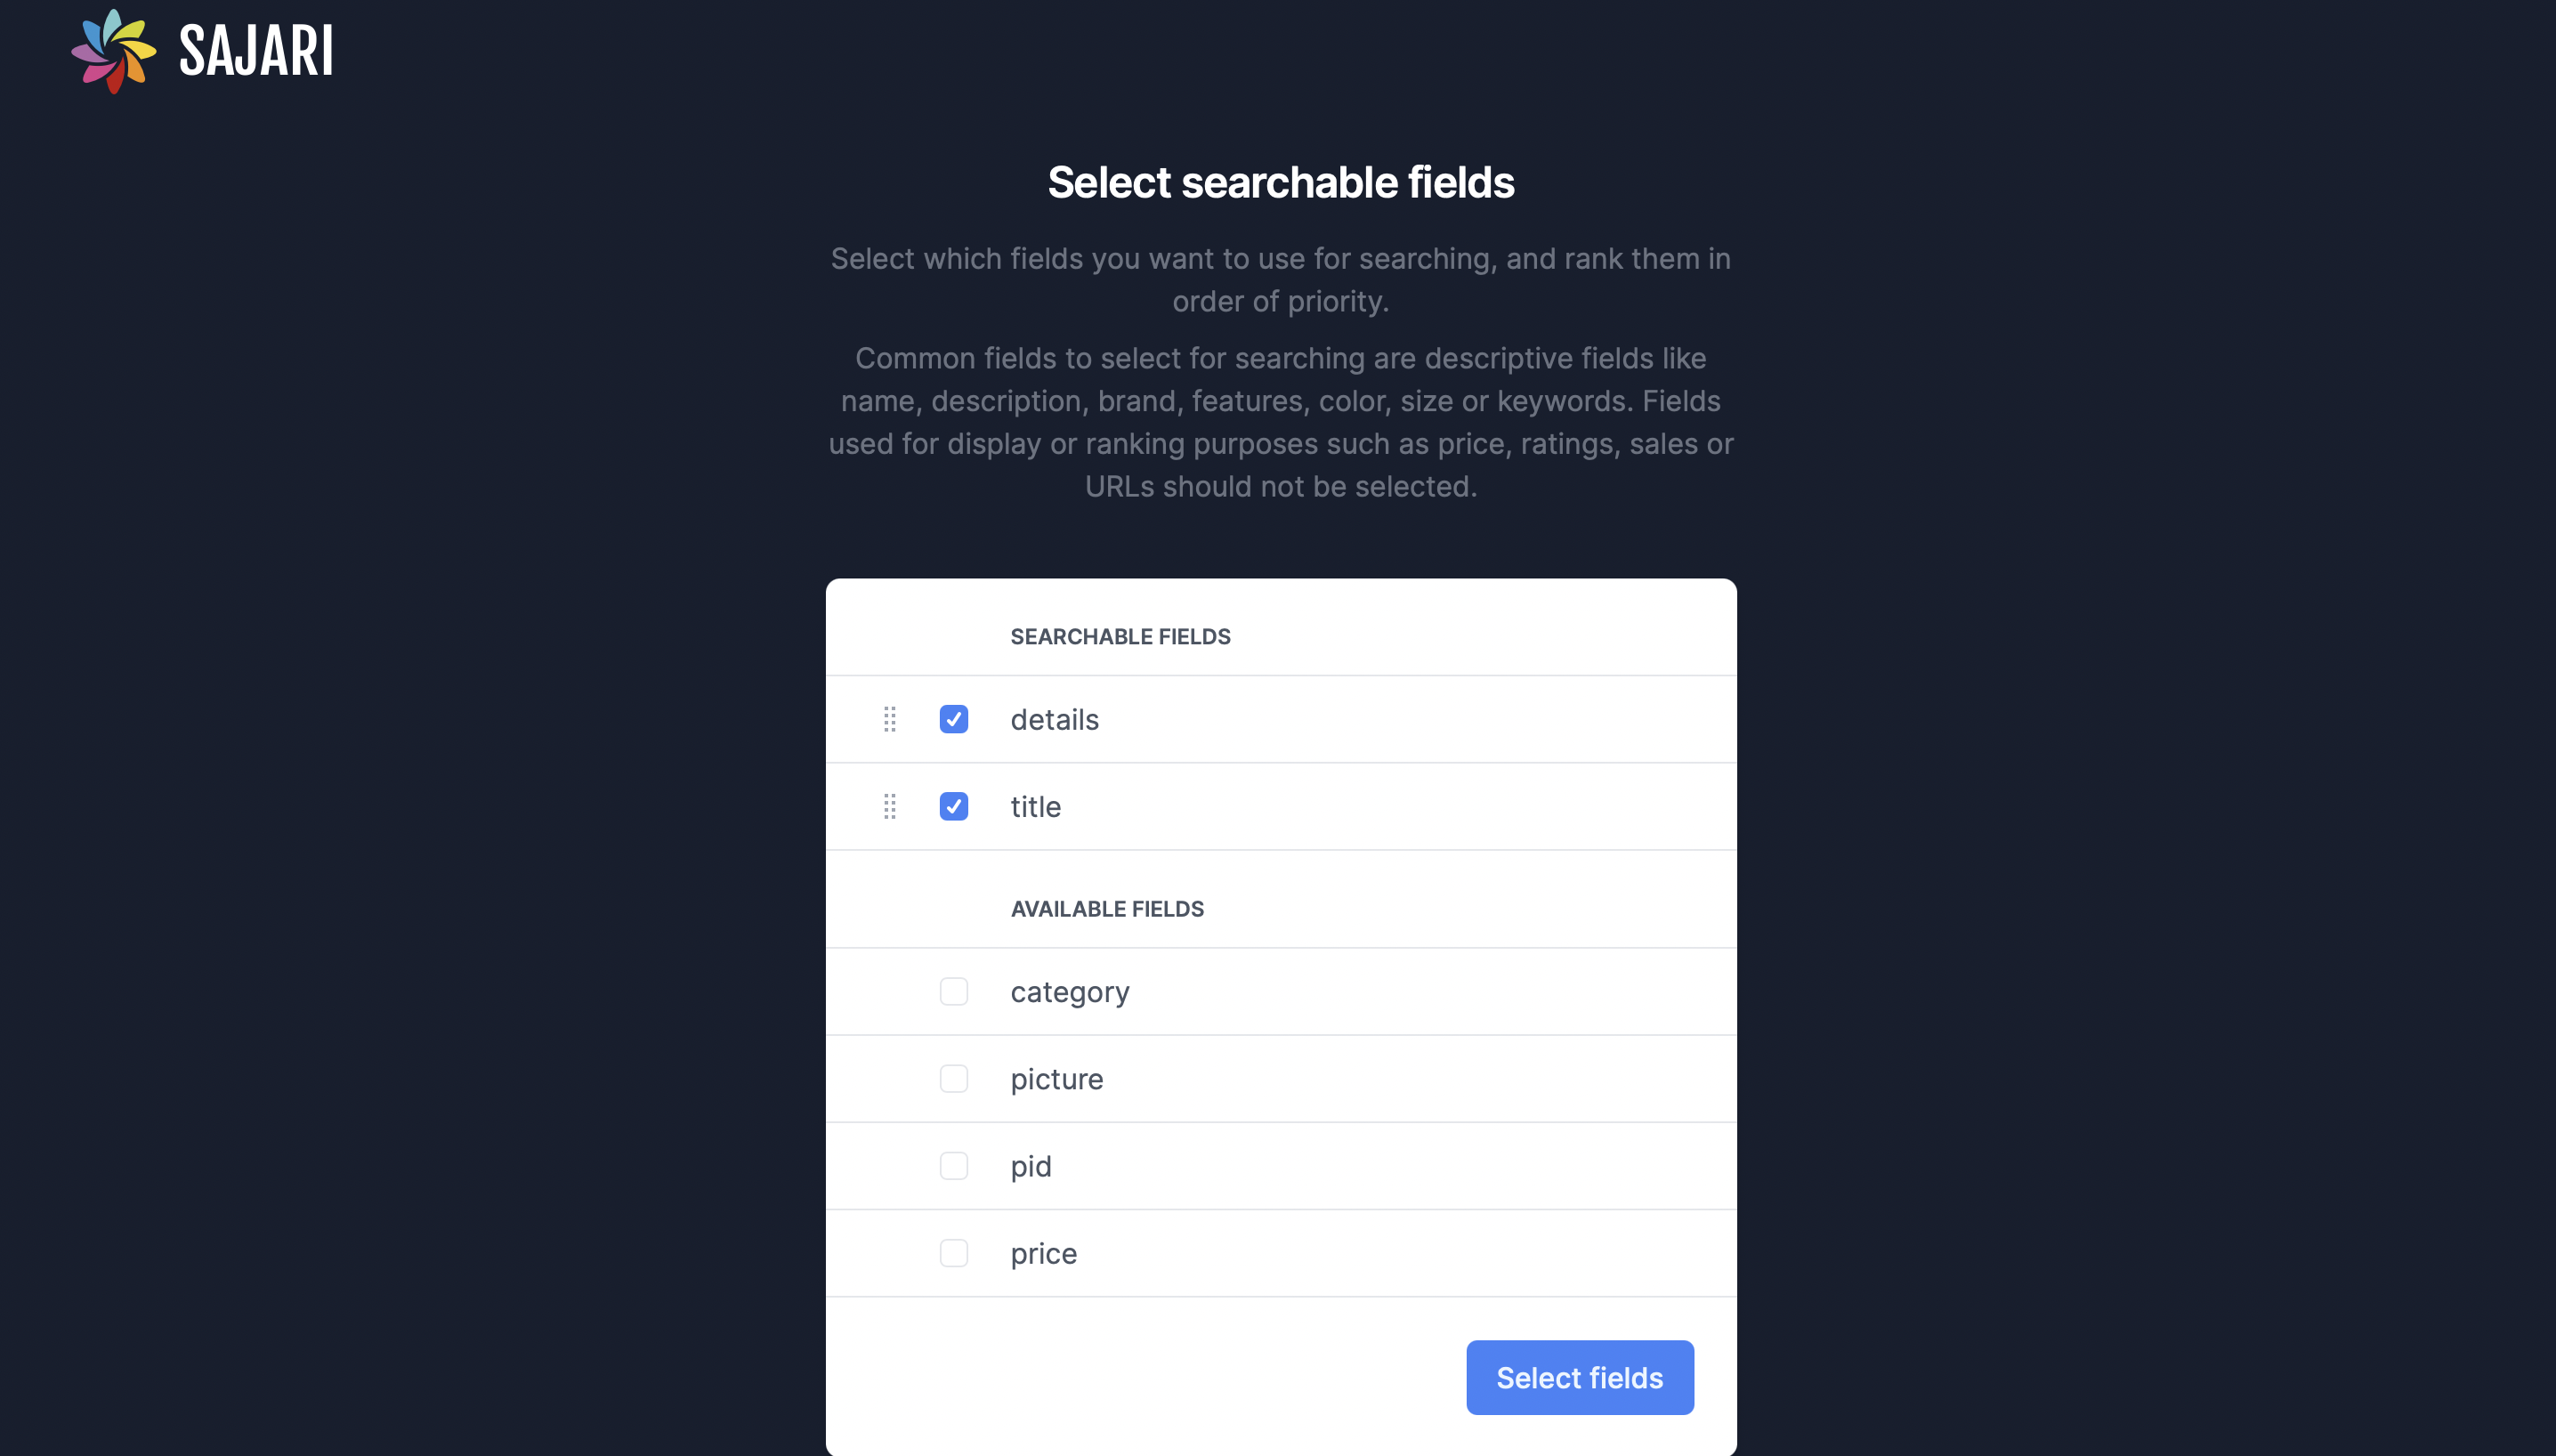
Next, Sajari will ask you to select the searchable fields. Select details and title.
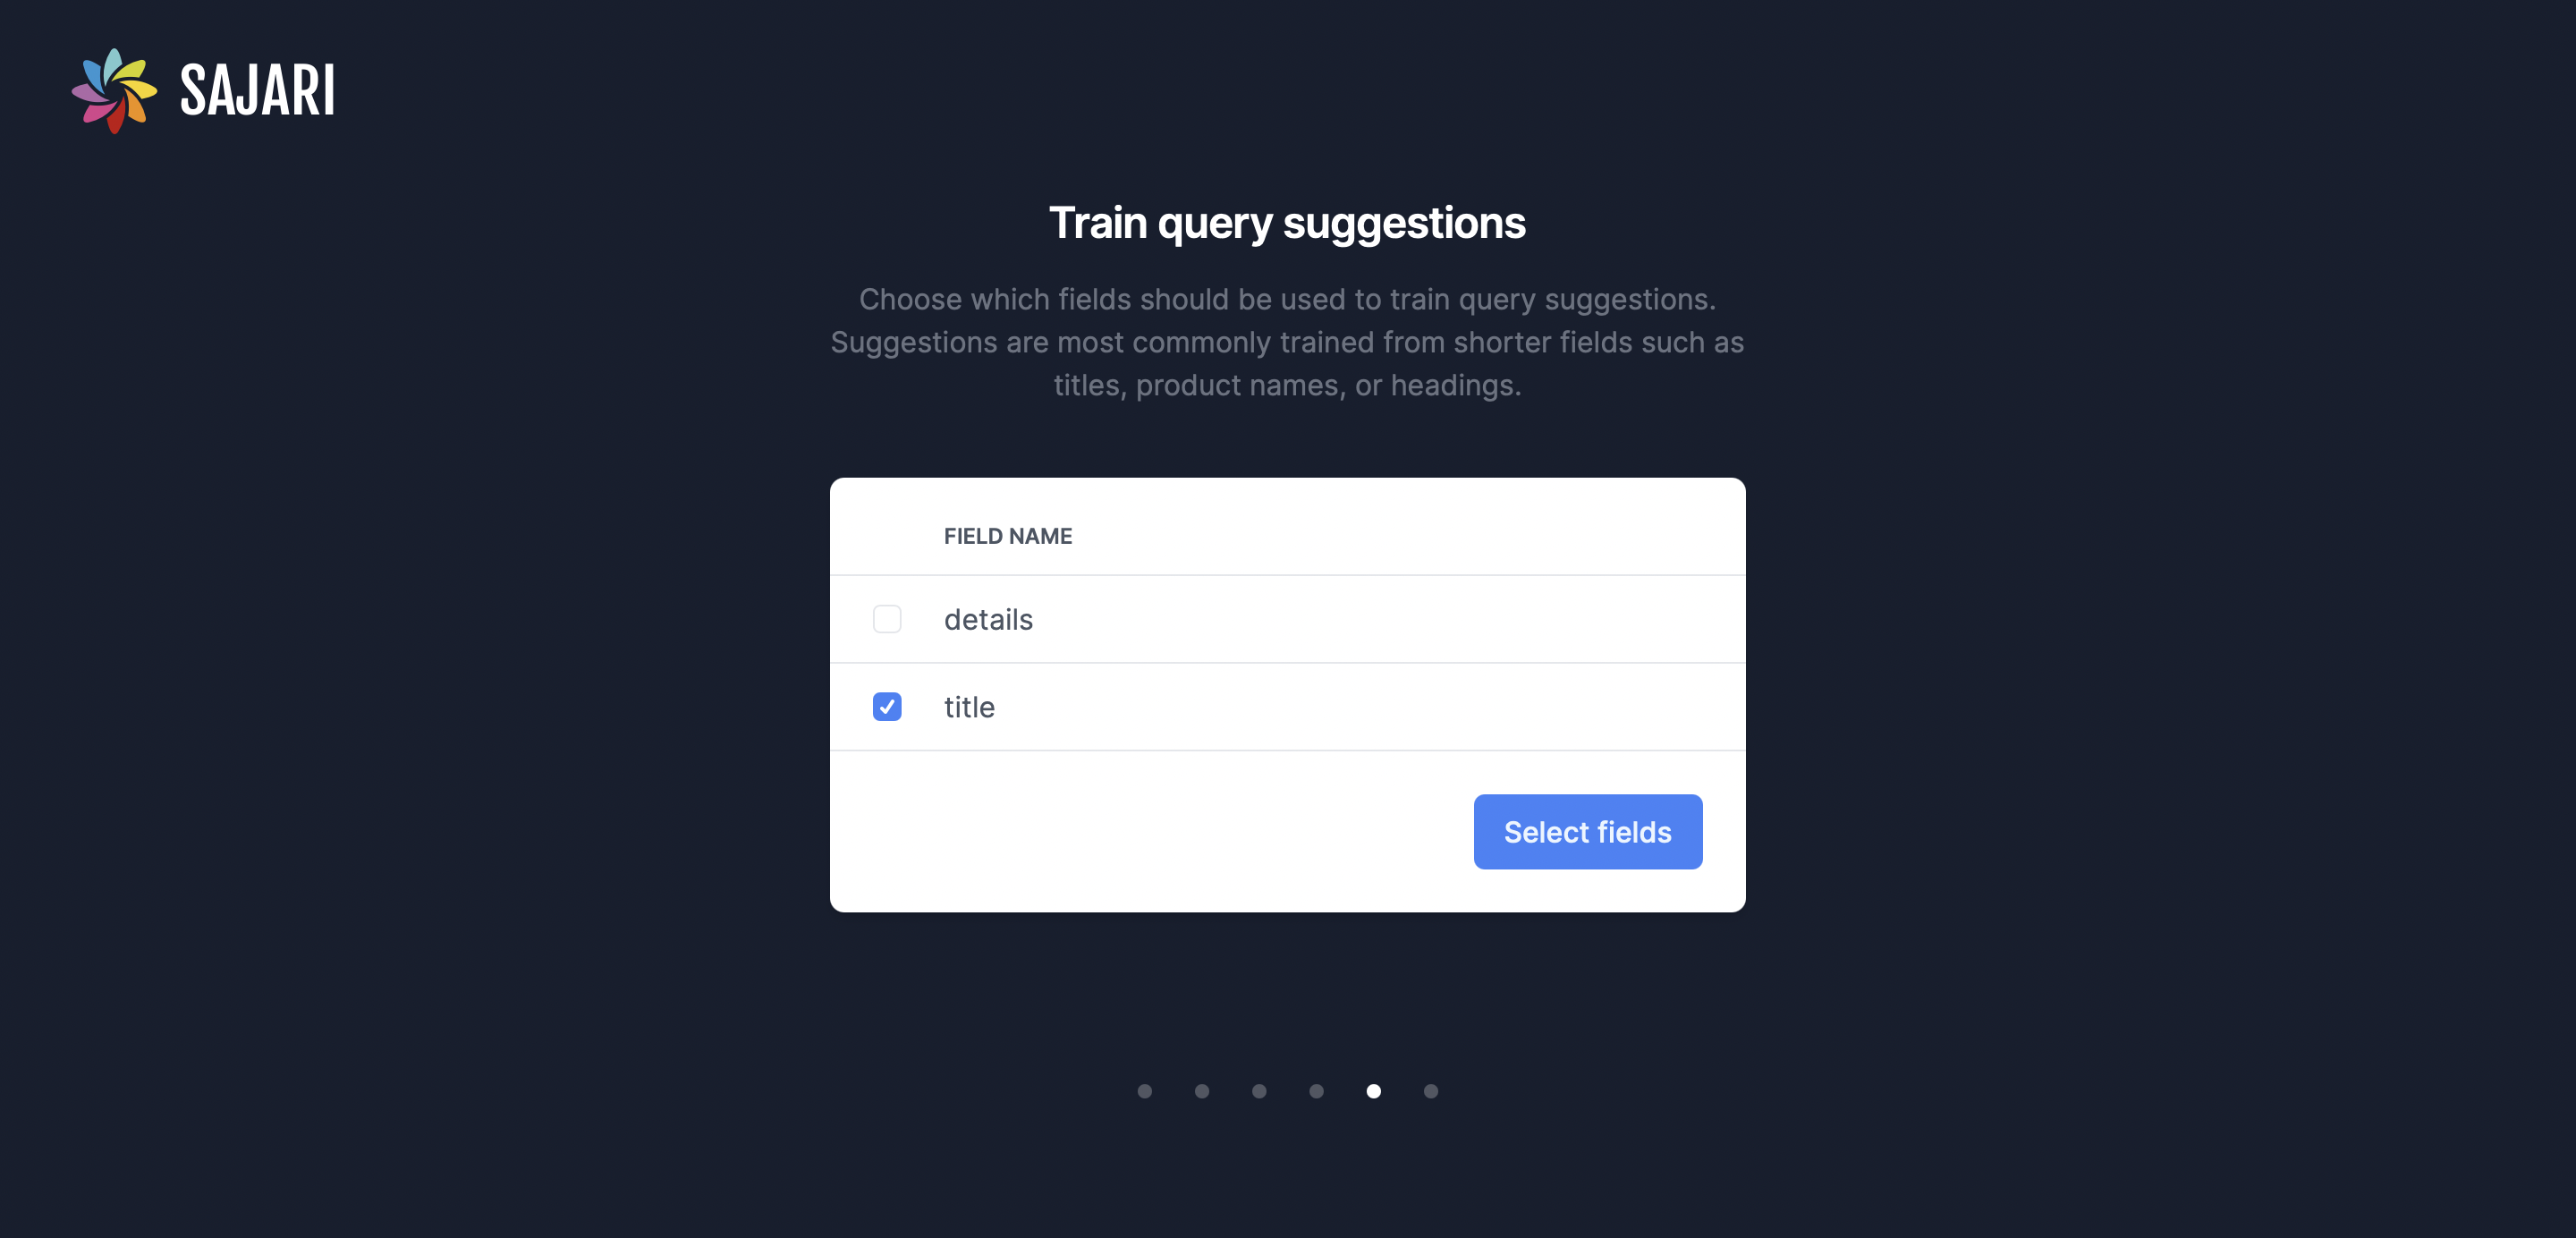
Pick which fields would be best to use to train query suggestions. Choose title.
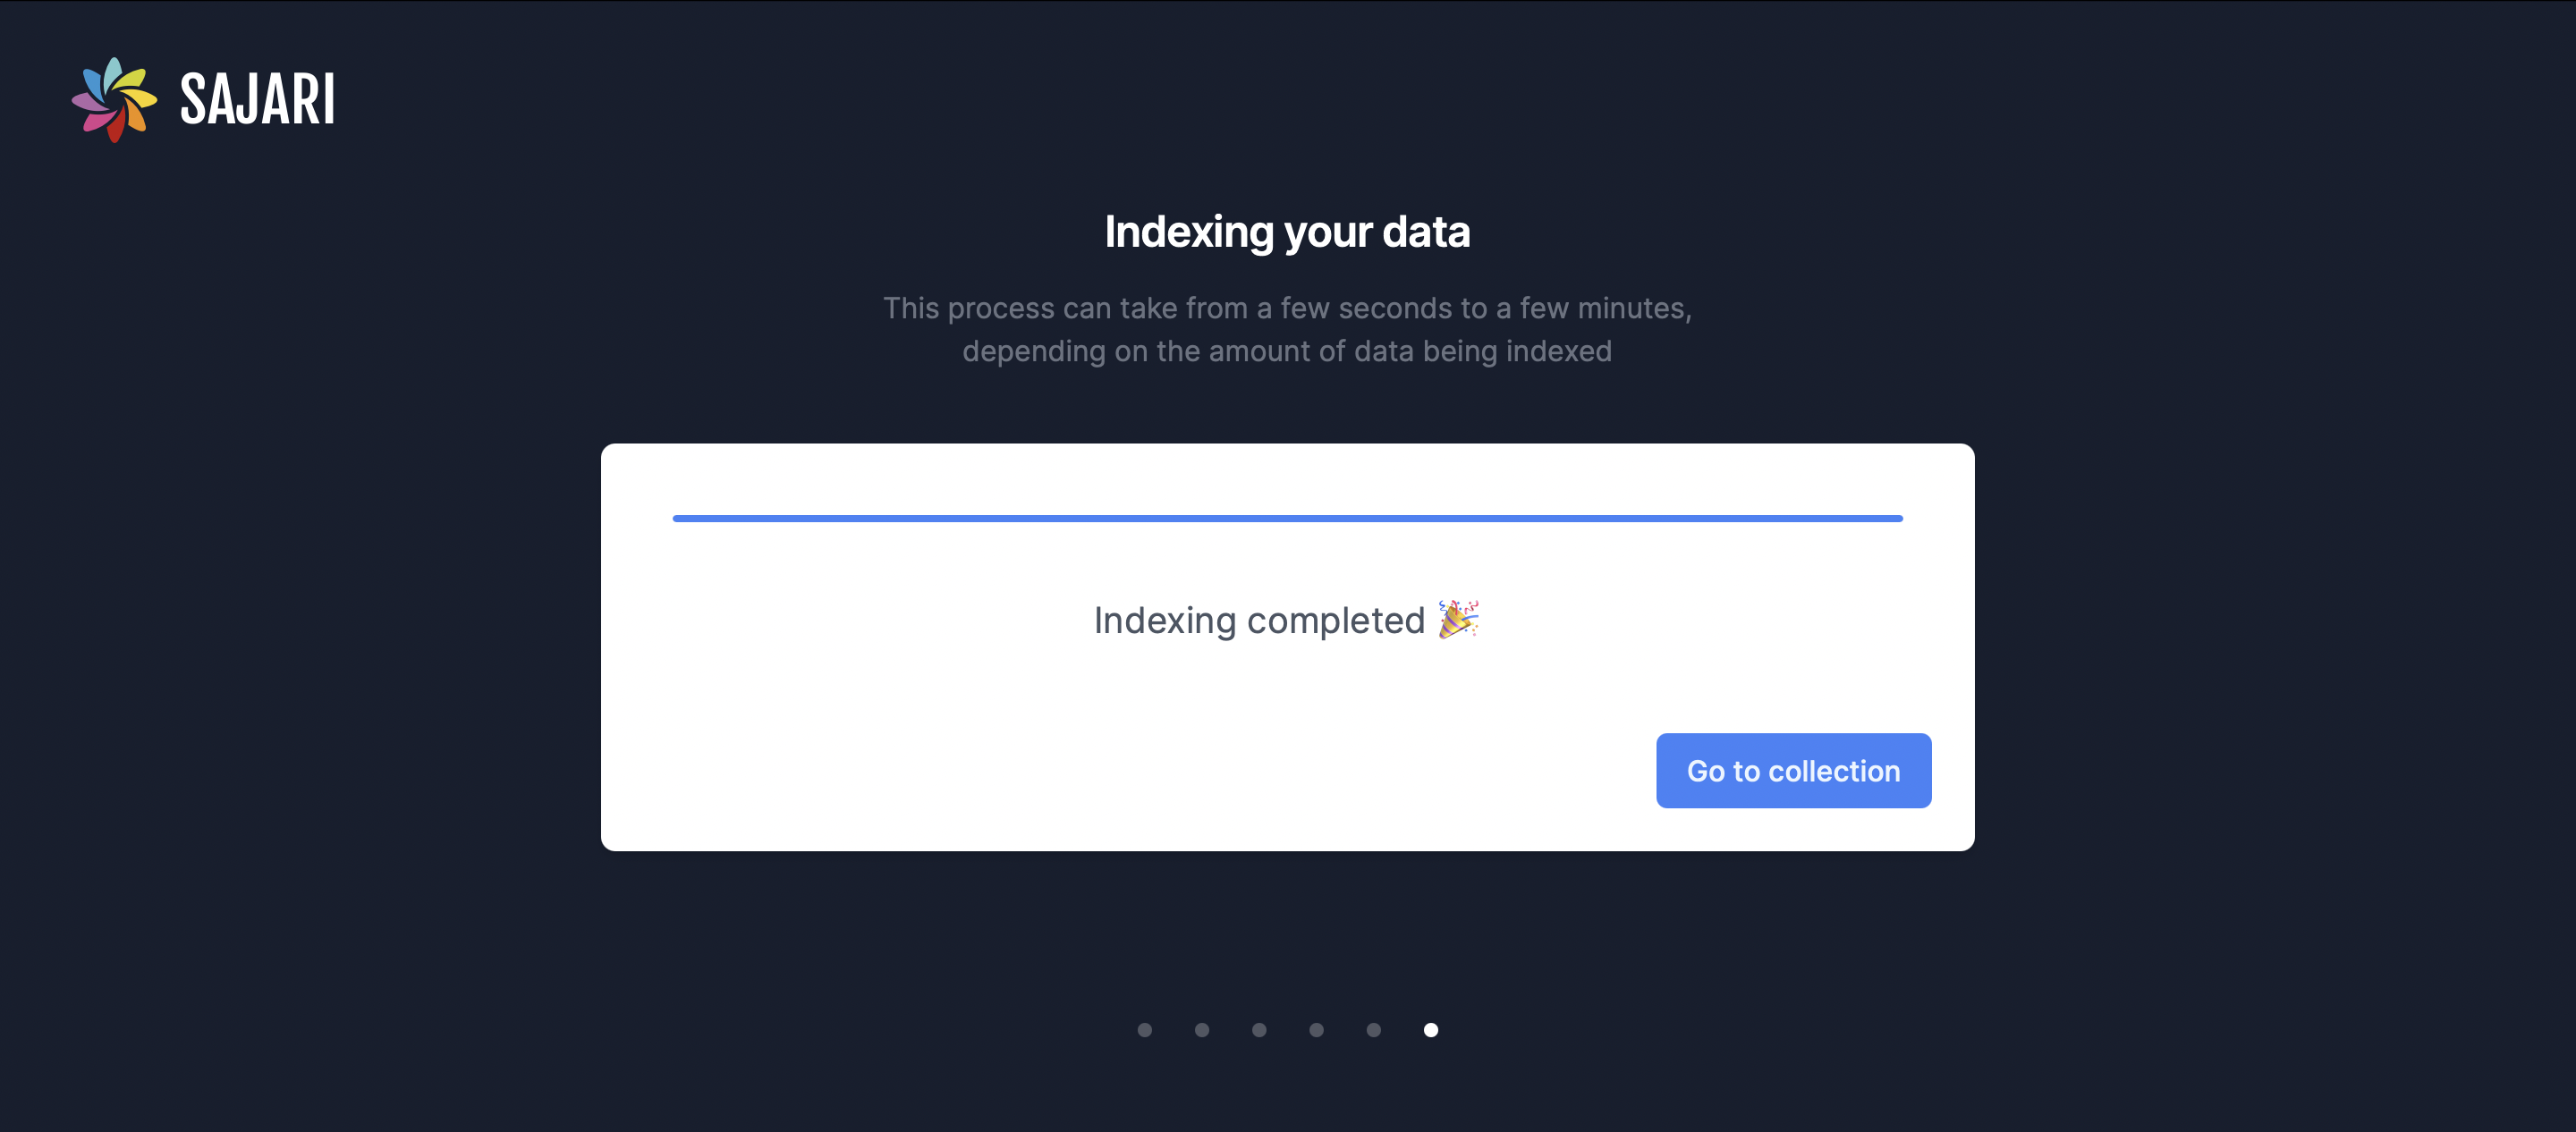
Once that’s done, Sajari will create a search index of your data! As you only input one record when you pasted the JSON earlier, there isn’t a lot of indexing to do. Once the indexing is complete, click Go to Collection.
You’ll be redirected to the Sajari Console. You’ll need to get your credentials to use the Sajari API. Click Credentials in the sidebar. You will see a set of keys and IDs—you need the Collection ID, Key ID, and Key Secret.
Going back to your code, you need a place to store these keys. Install dotenv:
Create .env in the root of the project directory with the following content:
Note: If you’re using the GitHub repository as you follow along, you can instead just rename .env.sample to .env.
Make sure to copy each of these values from the Credentials page in the Sajari Console.
Now, you’re ready to use Sajari’s API!
Modifying the server
Back to your project, install the Sajari Node SDK:
Then, open index.js in your favorite editor. Add the following at the very beginning of the file:
This will allow you to use the keys and values you set in .env.
When your server starts up, first check if there are any pipelines created for your collection for both types (record and query). Create them if there are none. Then, upsert your records in the database using the record pipeline to be indexed. This usually should happen maybe in a cron job, rather than on server startup, however, for simplicity we’ll do it this way.
Scroll down to console.log('Running server on ' + app.get('port'));, and below it add the following line:
const keyCredentials = withKeyCredentials(process.env.SAJARI_KEY_ID, process.env.SAJARI_KEY_SECRET);
You’ll use these API key credentials in all of our calls to the Sajari API. Notice that you’re using the values you set in .env.
Next, upsert the data from your database. Retrieve the data from the database and upsert them into your search index:
To upsert the records, use Sajari’s Batch Upsert Records endpoint. Create the Records Client:
You’re initializing the recordsClient, passing it the collection ID and the key credentials. Note that generally the client should be created outside the app logic, however, to keep the tutorial simple, we’re doing it here.
Next, use batchUpsertRecords to upsert the results received from your database:
Finally, check if the response returns any errors, and log the results:
Your server is now ready to create pipelines and update the indices of the records on startup. The last thing you need to do is add a couple of imports somewhere in the beginning of index.js:
Let’s test it out. In your terminal, run the server via npm install if it isn’t already running.
If everything is done correctly, you should see in your terminal upsert done after the server starts up. To make sure the data is actually being uploaded to your collection and indexed, go to Preview in the sidebar of the Sajari Console. You should see that there are six records indexed.

And you’ve learned how to create pipelines in Sajari and index your records! The next step is to implement the search API and the interface for it on the frontend.
Implement site search
Start by implementing the search API endpoint. Add the following before app.listen:
Inside the callback function, retrieve the q parameter, which is the query the user is performing. If it’s empty, return an empty array of results without performing the query:
Now, you’re ready to search your Sajari collection using the Query Collection endpoint. So you’ll need to create a collection client:
Note the use of the same keyCredentials you created before.
Send the request to query the collection, sending the collection ID and the query being performed. After that, return the response received.
Your API is ready. Now, we need to add the search interface. To do that, we’ll use Sajari’s Search UI Designer. Sajari’s UI Designer allows you to easily add search functionality to your website and customize it as best for you.
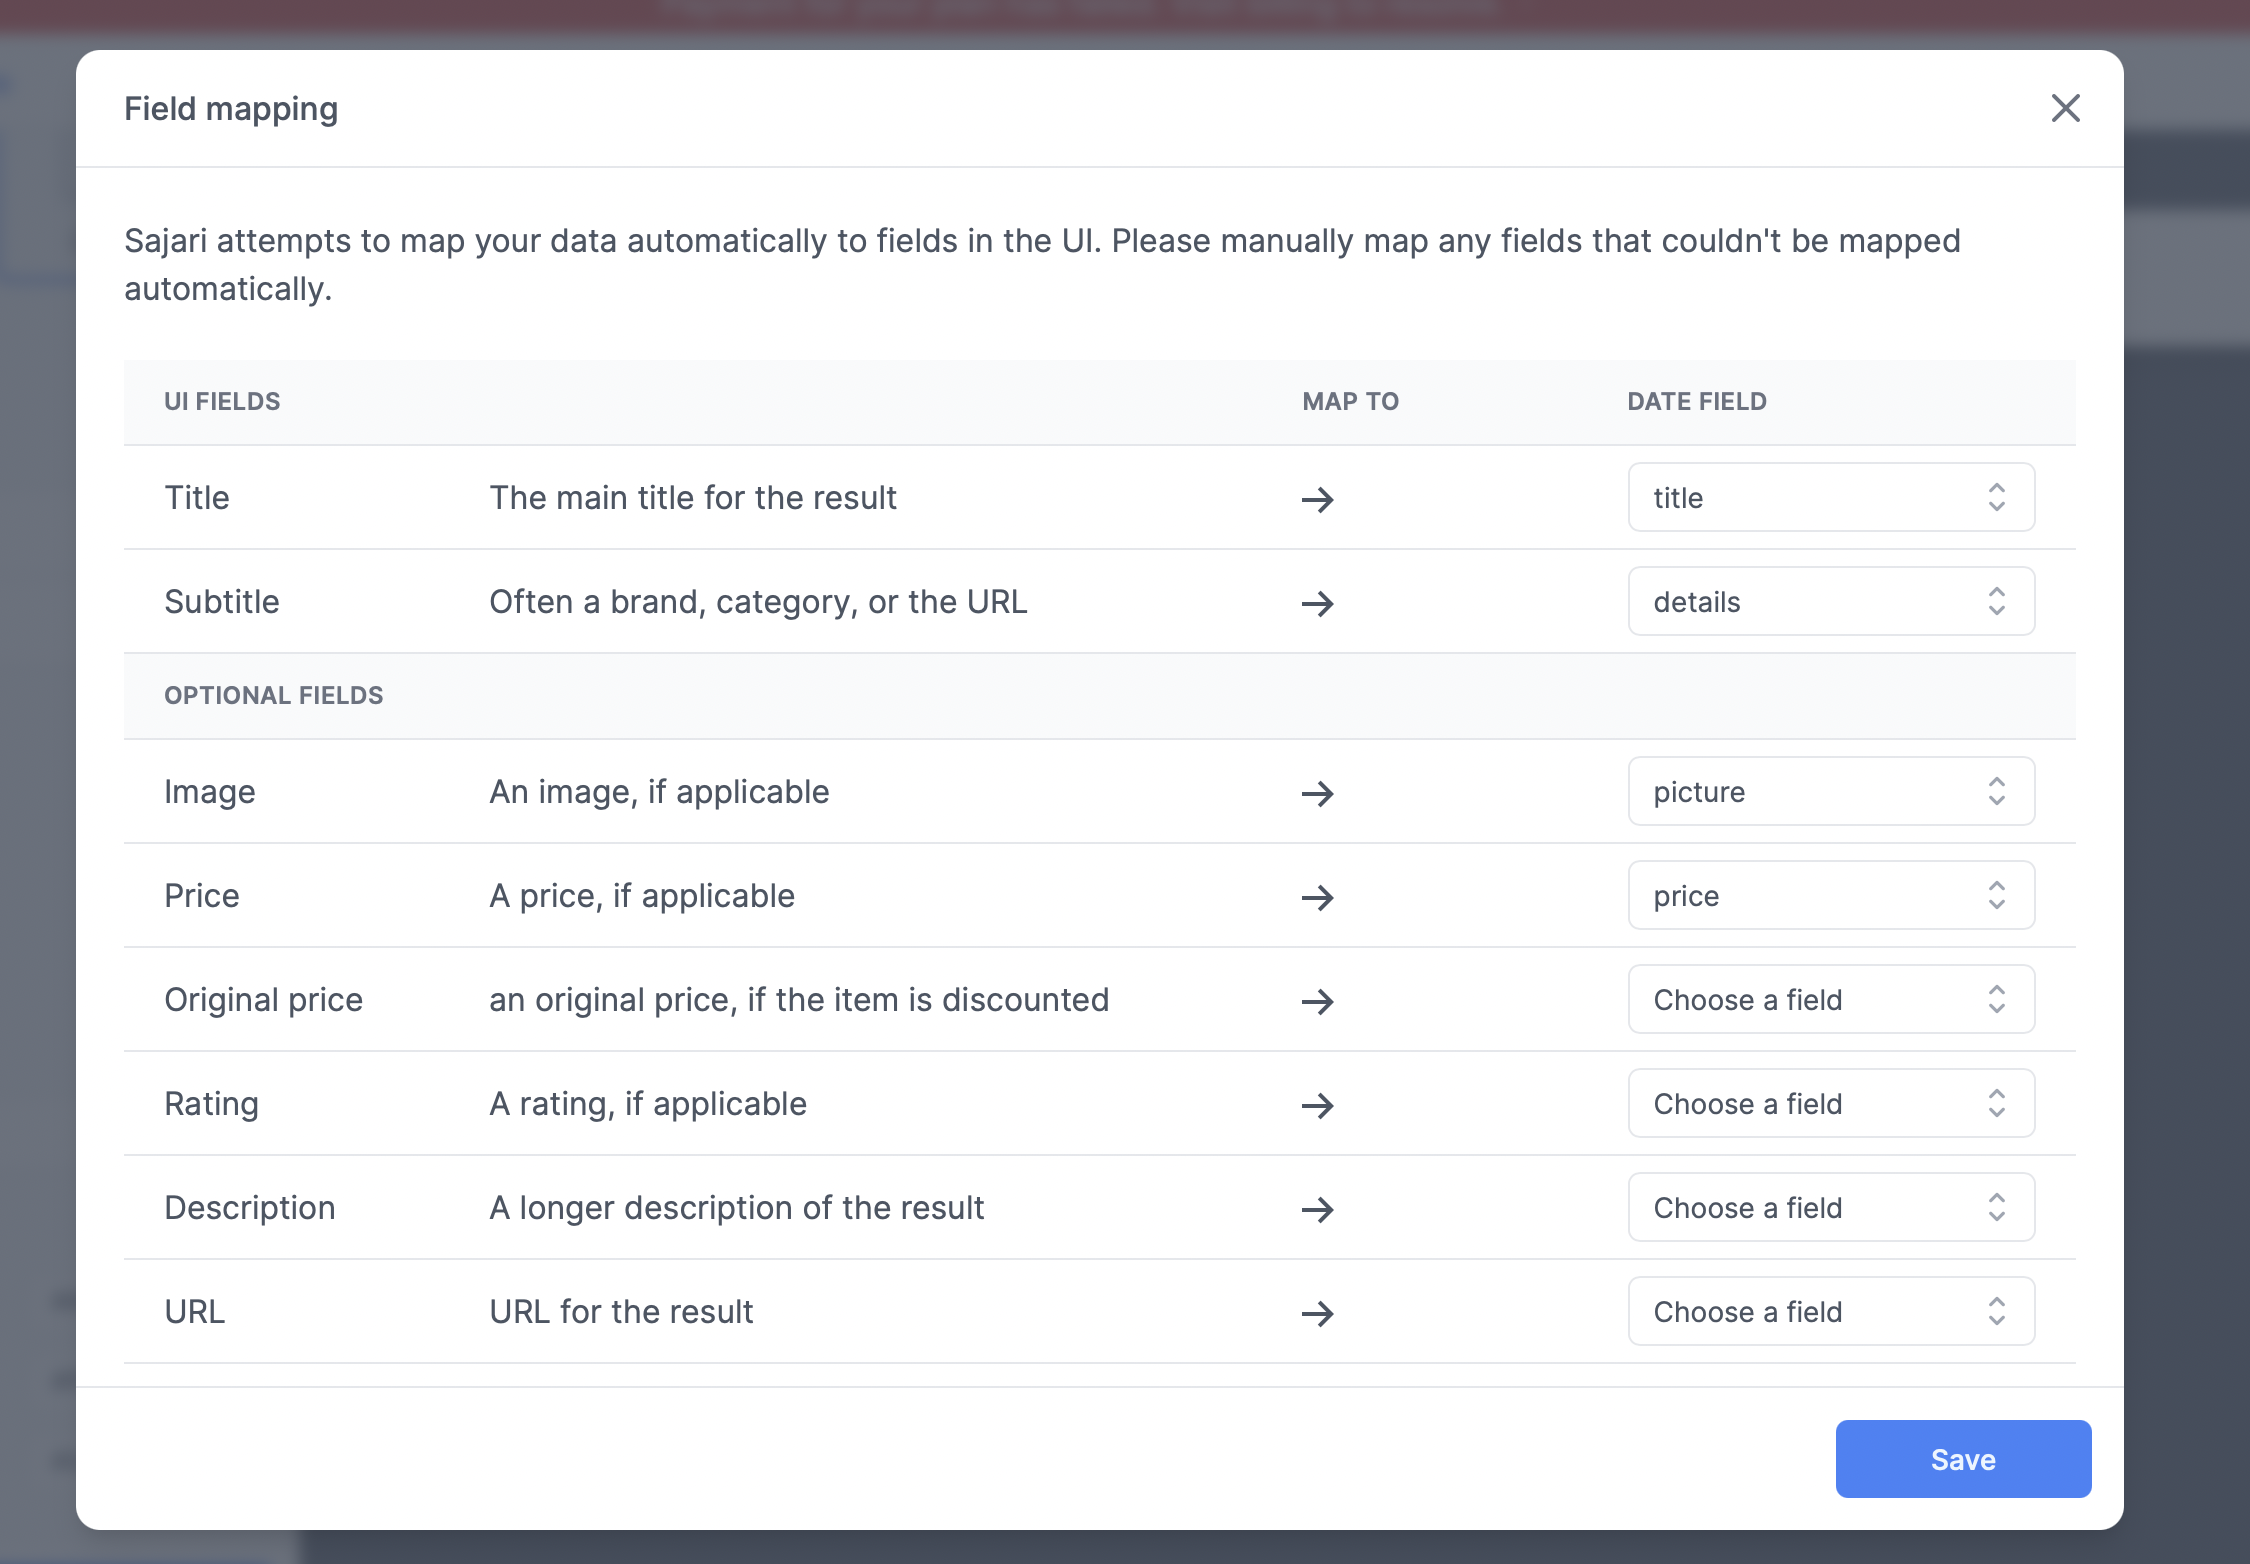
To use the Search UI Designer, go to your Sajari console and click on Search UI Designer. This will take you to the designer. You’ll be asked first to choose the fields you want to choose the title, subtitle and more. You’ll also be shown that “optional fields are unmapped”. Click on “Show All”, and choose for Image the field picture. For subtitles, choose details. Once done, click on “Save”.
Then, you can customize the Search bar as you want from the sidebar in the designer. We’ll choose the “Overlay” type. We’ll also use for the button selector “.search”. You can additionally change the colors Sajari will use, the image’s ratio, the style of the results (grid or list), and more. You can also test the search bar right while designing it in the designer.
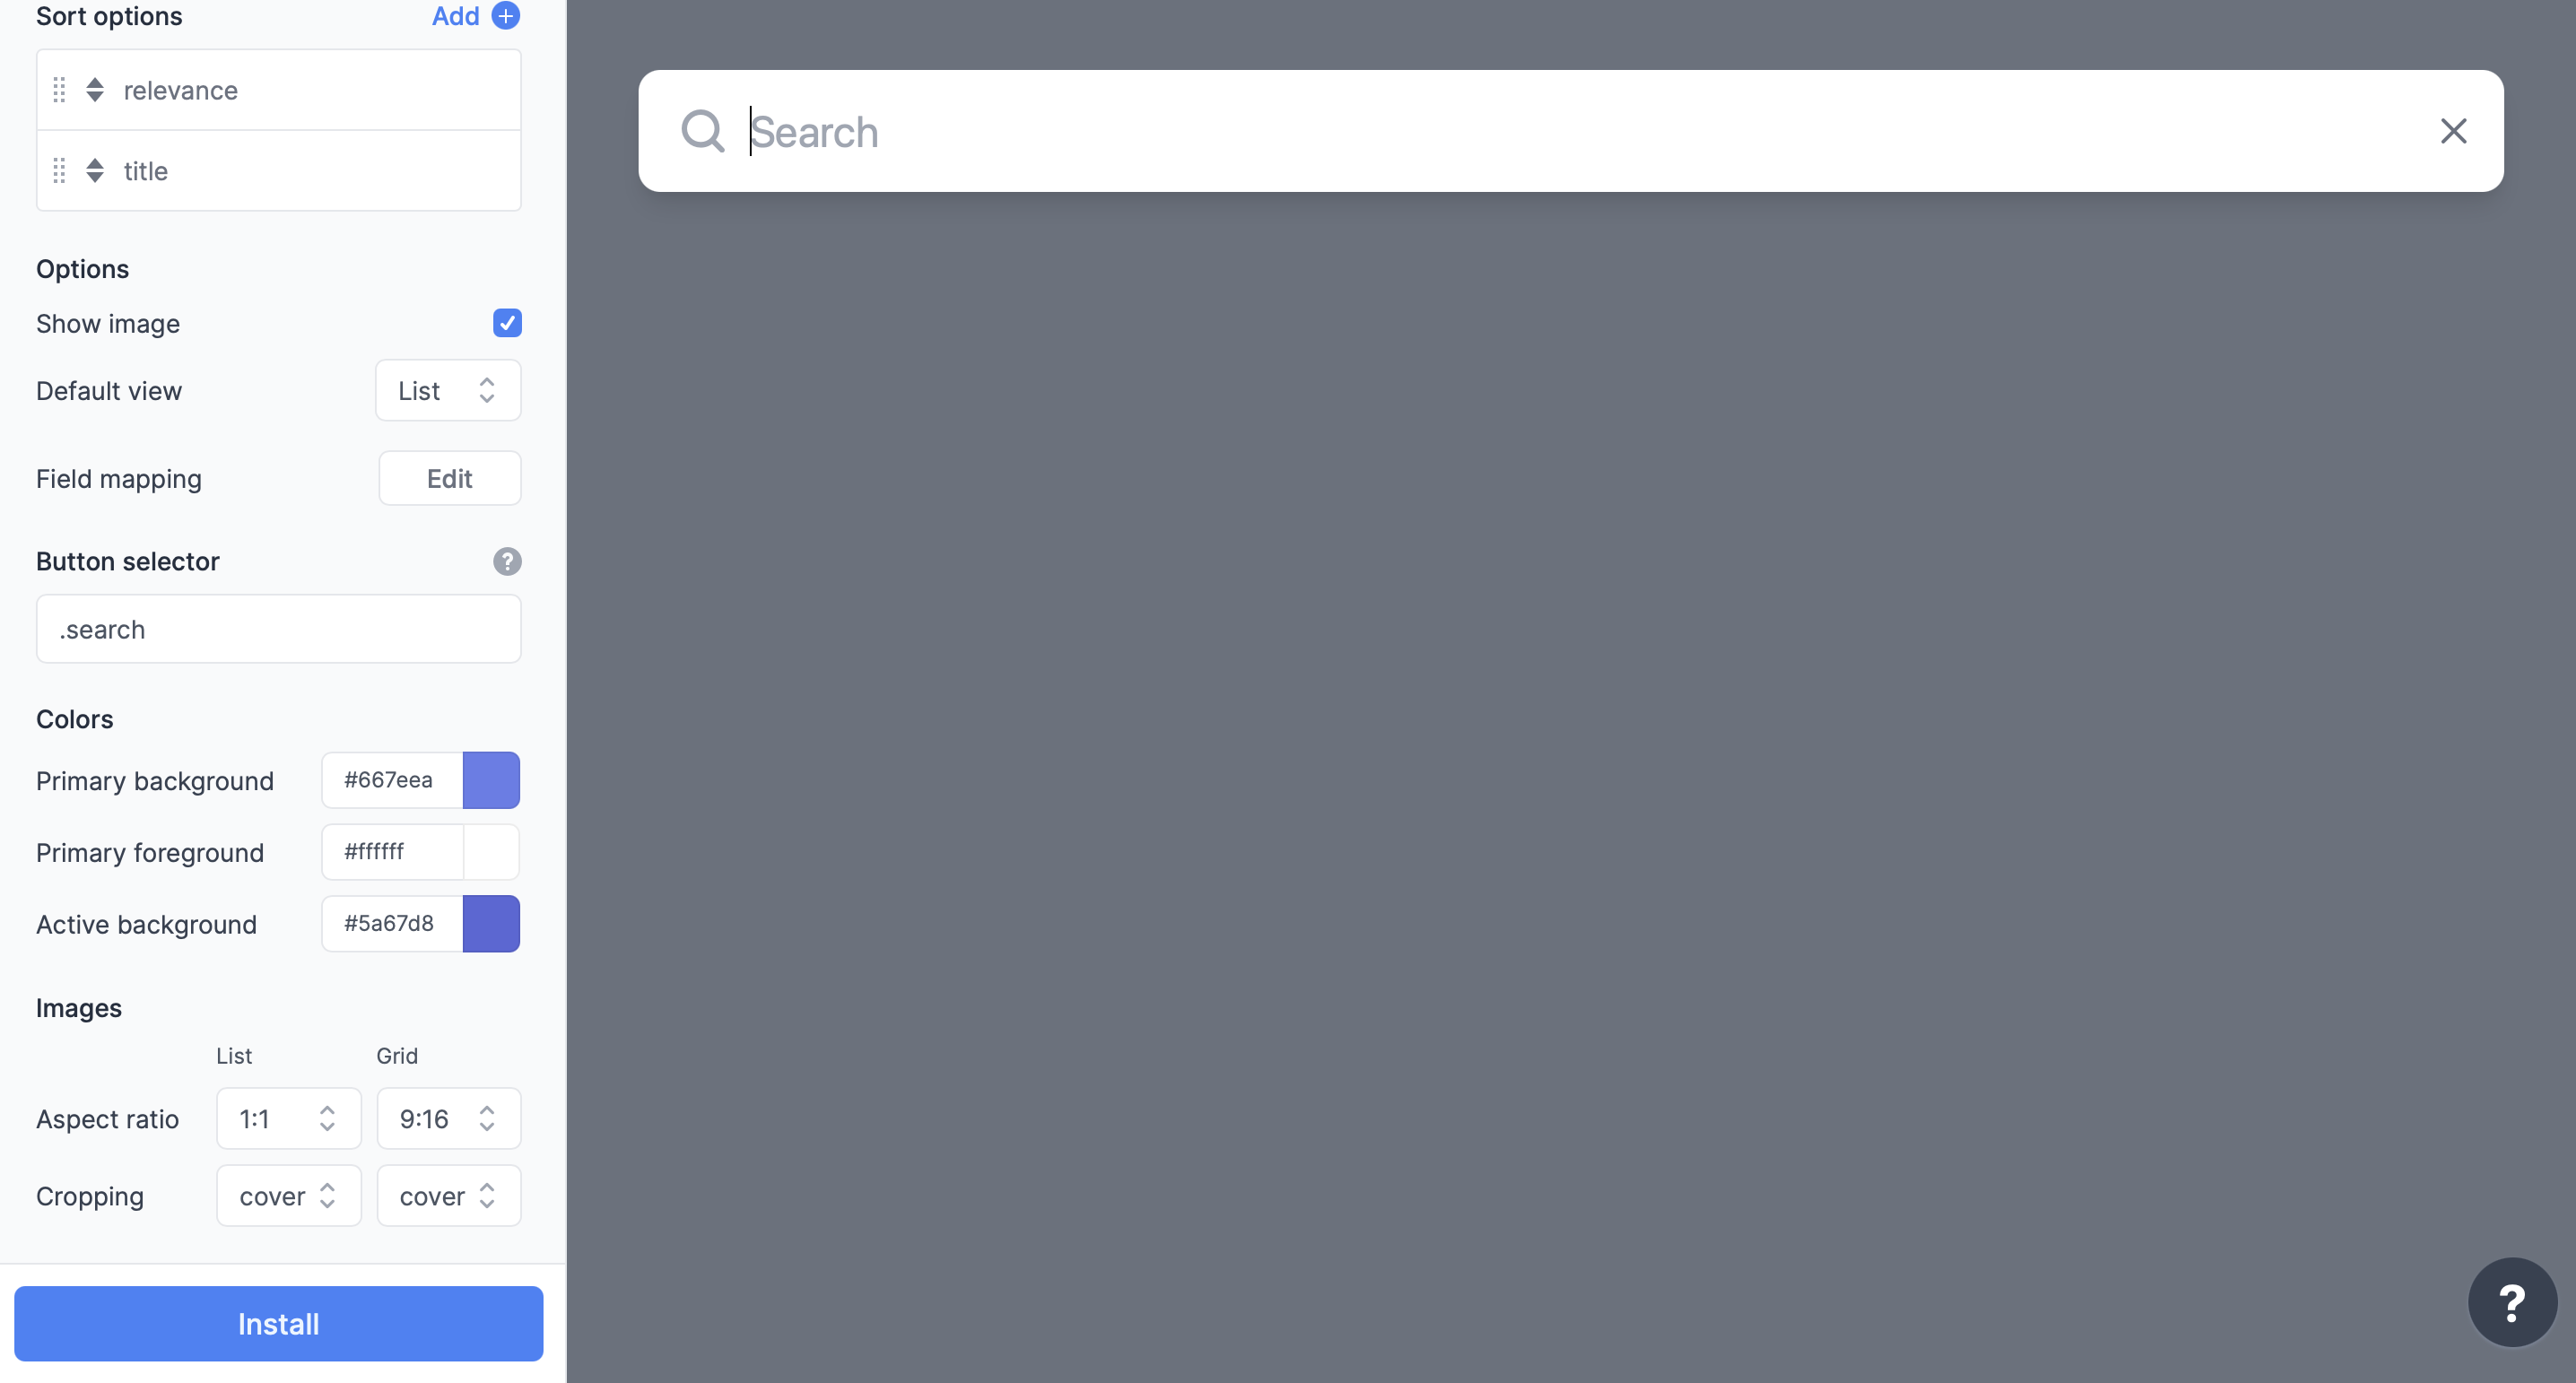
Once you’re done click on the “Install” button. You’ll get an HTML code to copy. Save it for now.
Go to views/include/header.ejs, and just before the closing of <div class="collapse navbar-collapse" id="collapsibleNavbar">, add the following elements:
Then below that, add the code you copied from Sajari.
That’s it. Your interface is now ready to use! If your server is not running, start it again: npm start
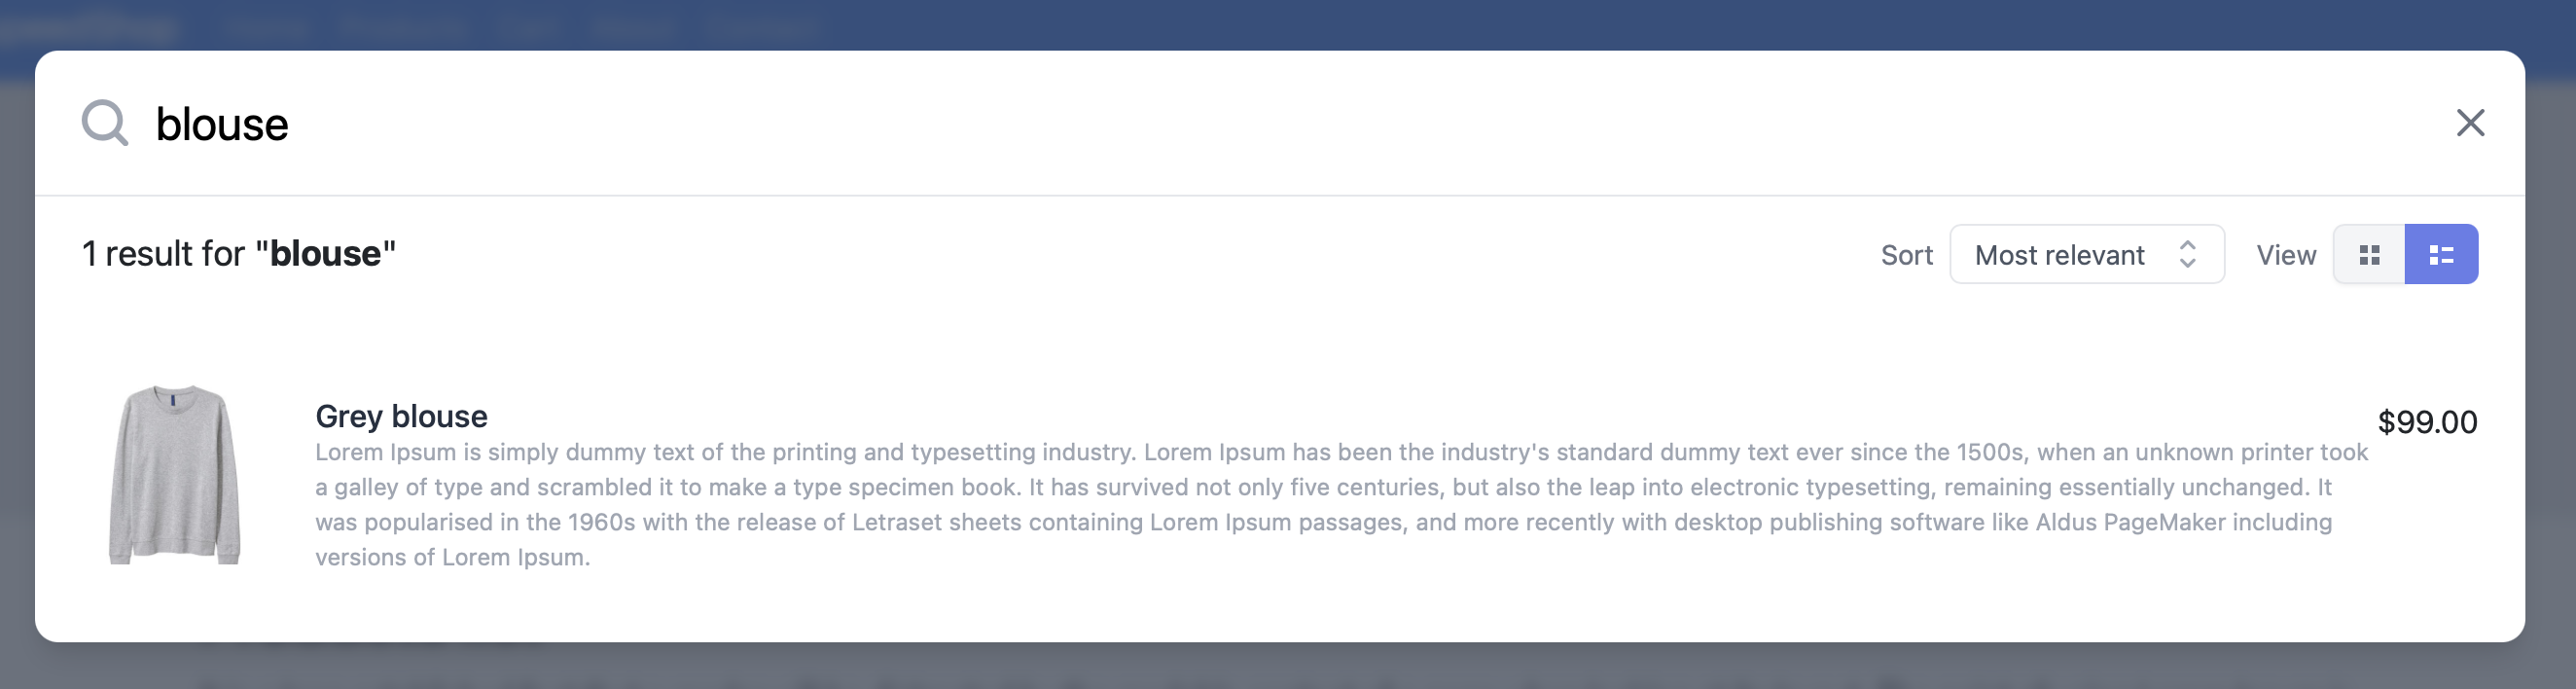
Navigate to the website, and you’ll see a new search icon in the navbar. Click it, and you’ll see the search overlay you created using the Search UI Designer. Try searching for anything—blouse, for example—and you’ll see the results with the title, description, price, and image.
With just a few snippets and steps, your site search is now working using Sajari!
Analyzing search queries and results
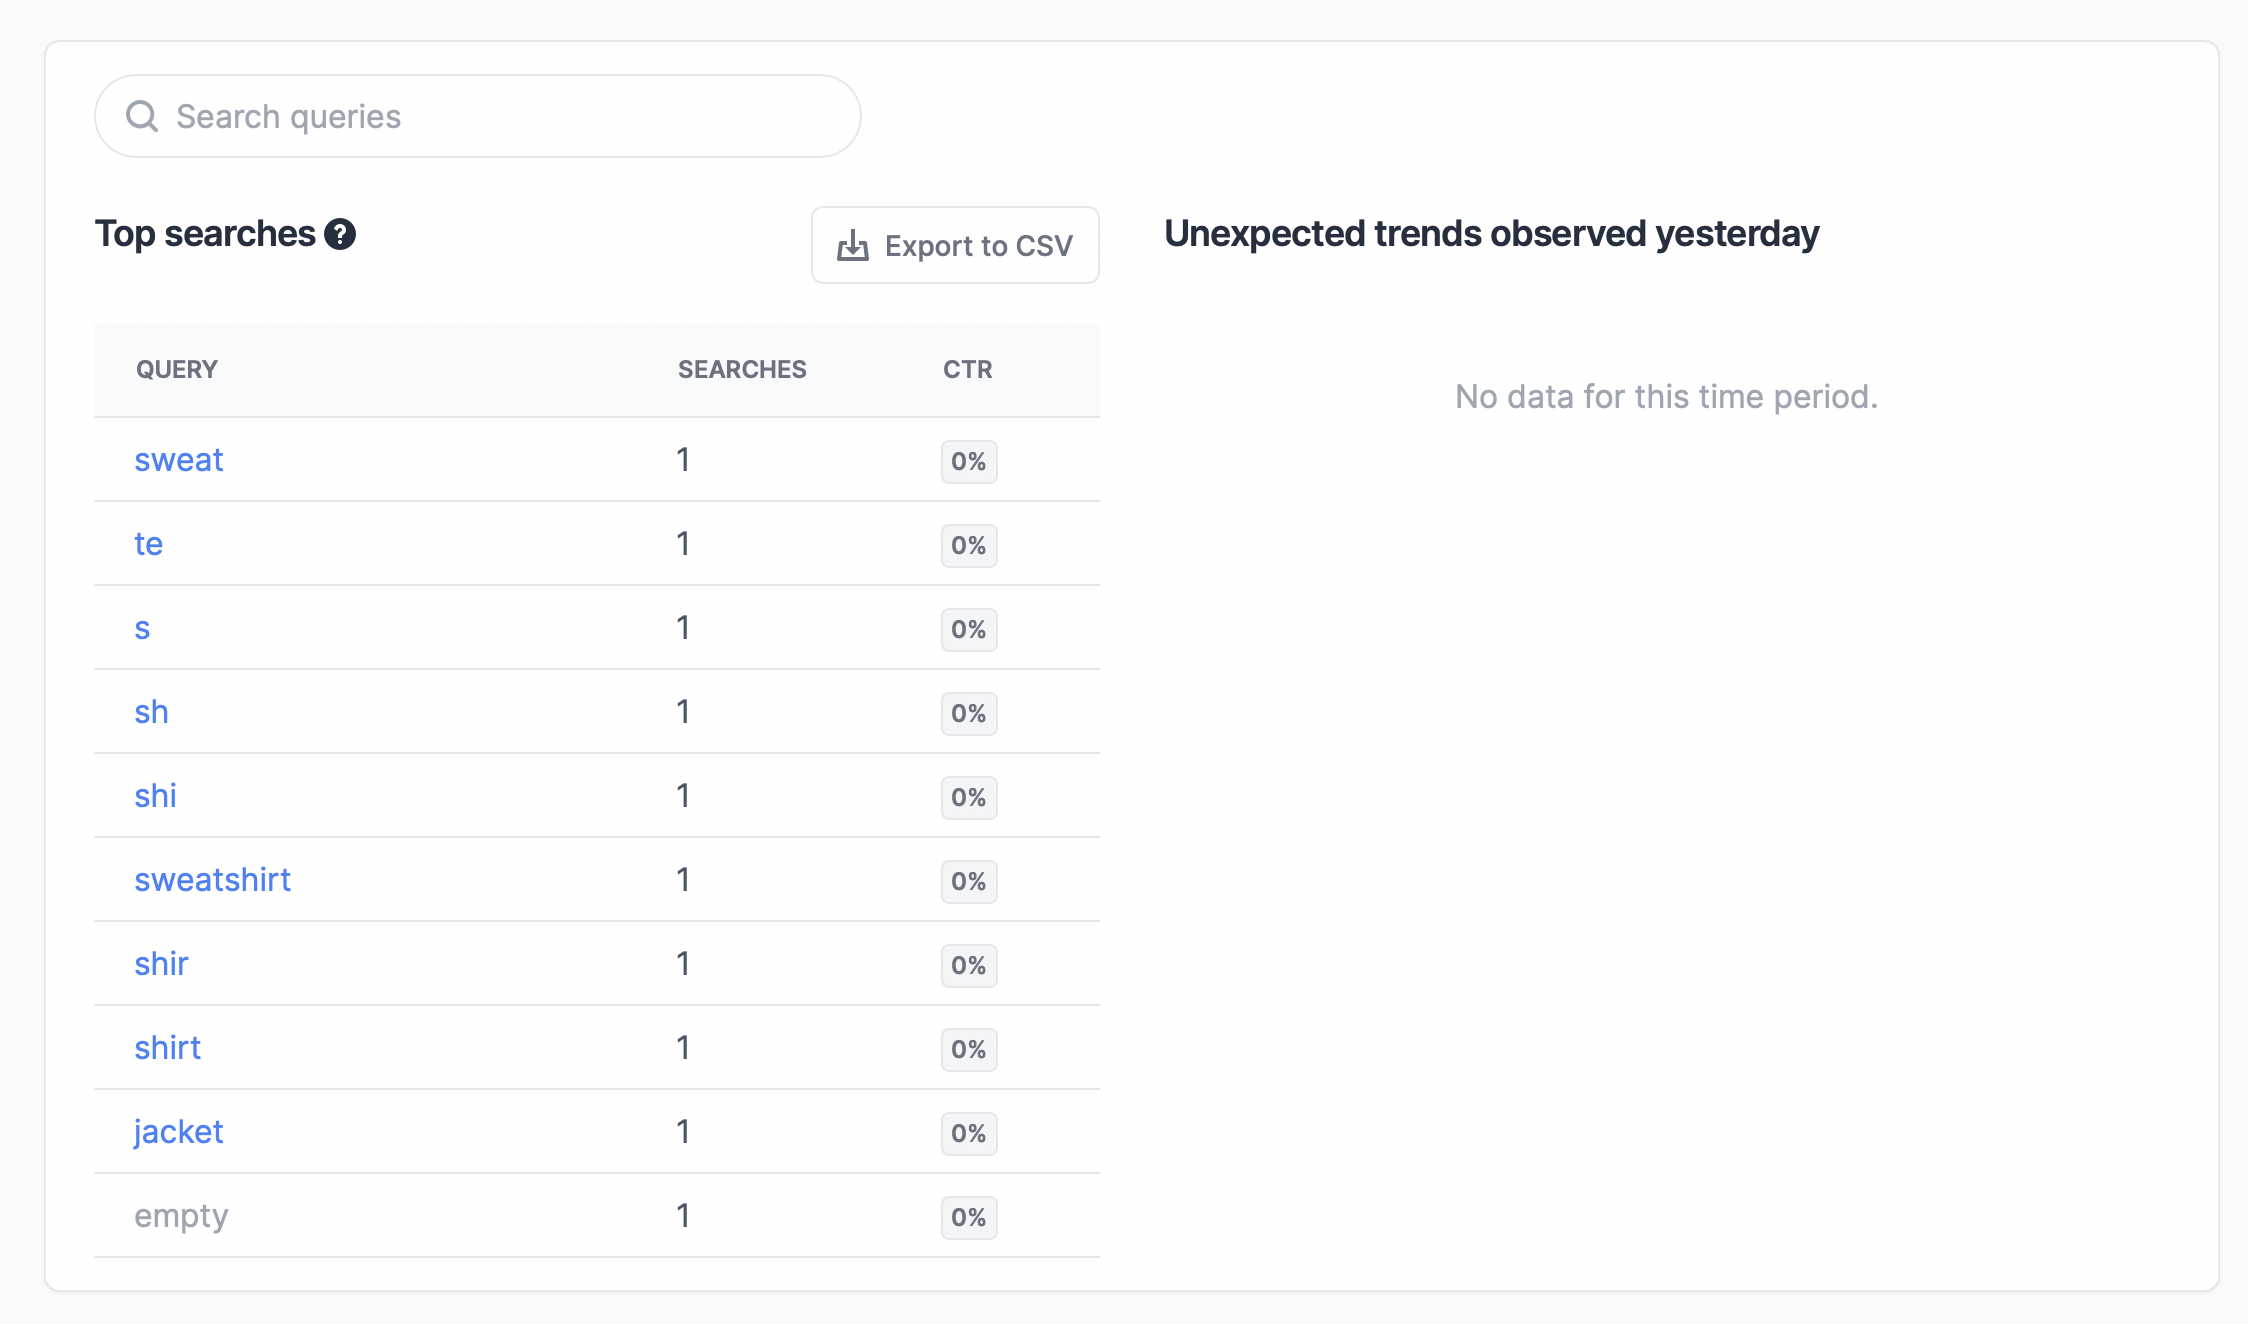
Sajari provides an easy graphical interface for you to view analytics of the search queries and results of each of your collections. To view them, go to the Analytics page on your Sajari Console.
Some data will not be visible right away, as it requires some time to update the analytics. But you can see information like top search queries and their CTR, search queries with no results and any content issues, and more.
Conclusion
Custom site search is an important feature of any site, but especially for e-commerce sites. Done correctly, it will guarantee a high conversion rate as your users will be able to find what they need with ease.
Using site search services like Sajari makes the integration fast and easy, and allows your retail company to focus on bringing the best products to your users, rather than the technicalities.
Finally, I built this tutorial using Sajari’s Node.js SDK, but they also offer JavaScript, Go, Ruby, PHP, TypeScript, and other libraries.