How to Integrate a Search Bar in a React App


A great on-site search experience contributes to customer satisfaction, which of course drives sales. Features such as autocomplete, spell checking, a well-designed search results page, and search filters and facets work together to improve customer loyalty and conversions.
Your e-commerce site needs a well-designed search bar for many reasons, not least of which is that your users expect it. However, developers should consider a couple key areas of impact. The first is that easy, fast navigation significantly increases the average time a user spends on a website, and the second is that a robust search bar will provide you with search analytics. It can tell you what users are searching for, whether or not you were able to show them what they wanted, and what ultimately led to a purchase. If a user left your site empty-handed, the data surrounding their search can still be used to improve your user retention rate.
In this tutorial, you’ll learn how to build a well-designed, functional search bar using Sajari React. You’ll understand why a well-designed search bar has such a positive impact on user experience, and produce a short video to show your results. We’ll cover why you should build a search bar using Sajari React, as well as how to integrate the Sajari React SDK with your React application.
If you want to jump straight to the code, check out the GitHub repo here.
Manually Building a Search Box
While creating a search function yourself and integrating it with your website is an option, it has its disadvantages:
- Development time increases.
- Scaling up your app may require you to update the entire code—this can be stressful and time-consuming.
- Leveraging AI for better search results and user experience can also be time-consuming and difficult.
- You’d need to write separate code for error handling, analytics, and logging search results.
Unless you have hundreds of employees and time to build your own infrastructure from scratch, using a site search service is the best solution.
The Sajari React Solution
Sajari is an advanced AI-powered site search and discovery solution. Sajari can be scaled effortlessly, so you don’t have to worry about your site search. Plus, its free tier provides up to 10,000 queries/month—perfect for a side project or a developer plan.
The Sajari React SDK is a library of React Hooks and components to help build fast and powerful search interfaces. The Sajari React SDK allows you to seamlessly integrate Sajari into any web-based app using easily composable components.
In addition, the company offers PHP, JavaScript, Ruby, and other libraries for quickly integrating a search field onto a site.
How to Set Up and Install React
In this tutorial, you will use the Create React App template to initialize a React.js project quickly. In your project’s root directory, run the following commands in the terminal:
The last command, npm start, will start the development server on your system’s port 3000.
Navigate to http://localhost:3000 in the browser. Here is what your app will look like:
Next, you need to install the Sajari React components. Run the following commands in the terminal:
This tutorial uses Tailwind CSS for styling the app and search bar. You can refer to the official documentation on Installing Tailwind CSS with Create React App for more information.
How to Integrate a Search Bar in Your React App
In this section, we’ll create a search bar using Sajari React Search UI components. For tutorial purposes, we’ll use the Best Buy sample data set provided by Sajari React SDK. This sample data is accessed using the key provided in the Sajari Docs. The applications made with these keys can only fetch data from localhost so you shouldn’t be able to deploy these applications.
Update src/App.js file like this:
Start by importing the components from @sajari/react-search-ui package. Inside the App component, create a fields variable using the FieldDictionary class to map fields in your data to the required fields—name—and display them in the UI.
You wrap your entire application in the SearchProvider component to share the application state between different components. For example, in the current query:
In the above code, the search configurations are passed to the search prop. You are using the Best Buy sample dataset passed in the pipeline property. The fields variable is passed alongside the pipeline prop in the search prop.
The searchOnLoad is a Boolean which instructs on whether to search the initial load or not.
Display the result of the search using the following components:
- Input - A text field to capture query input type.
- Summary - Displays the total number of results.
- ResultsPerPage - Captures user input for how many results are displayed per page.
- ViewType - Allows users to toggle between list view and grid view.
- Results - Displays results based on the searched query.
- Pagination - Used to navigate through a large response.
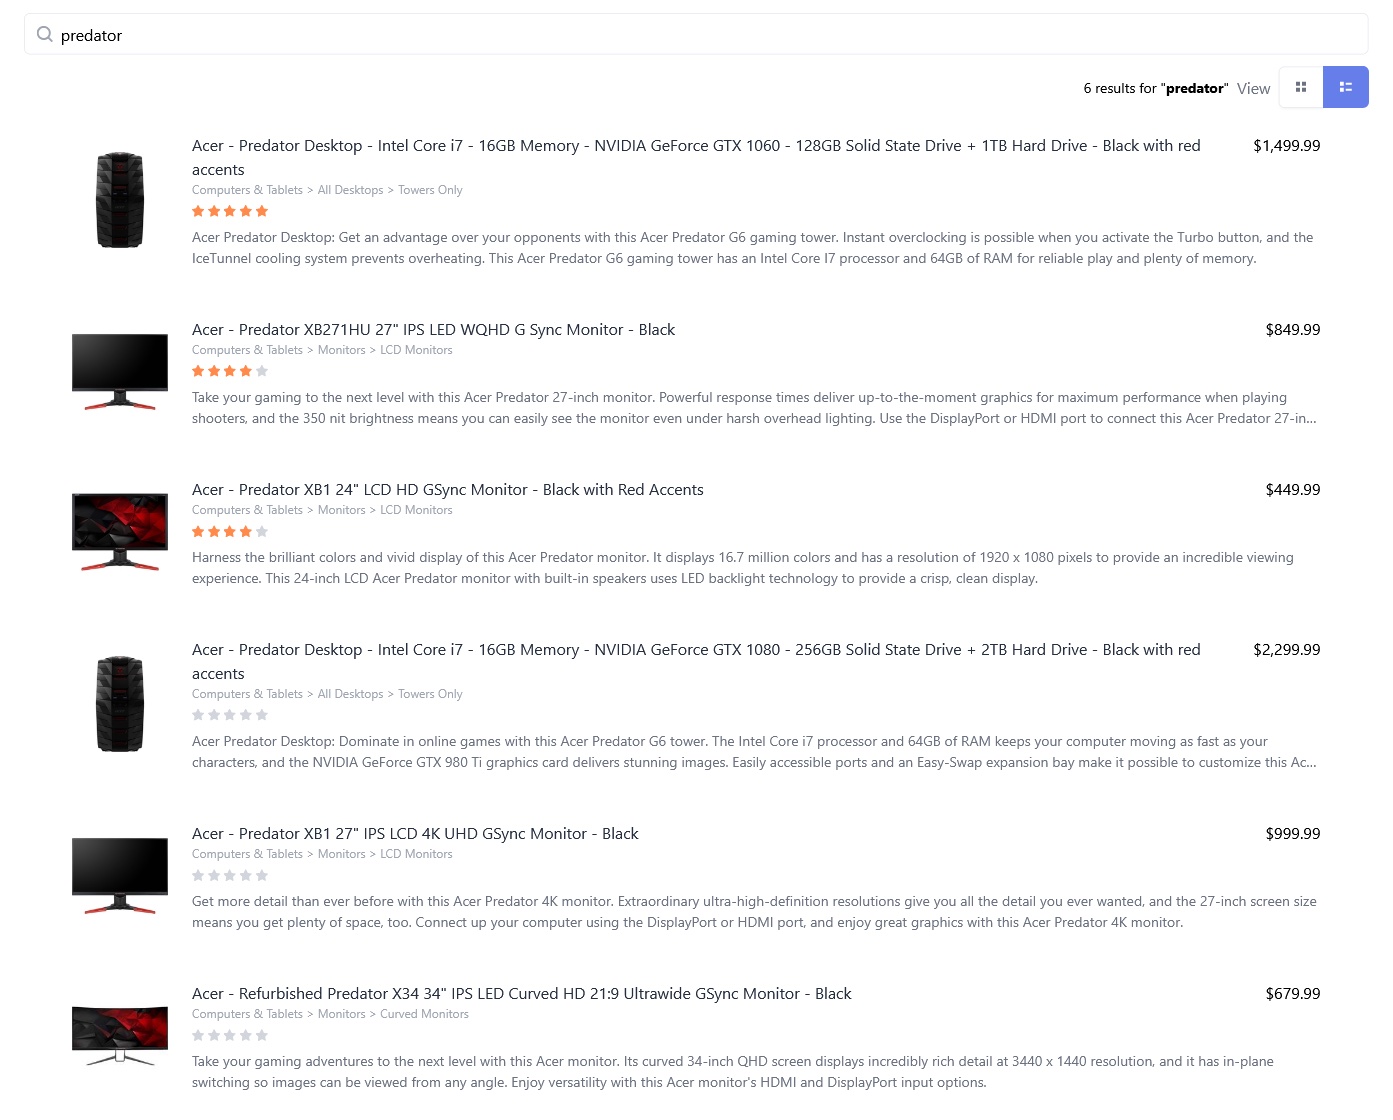
Here’s what your app should look like:
How to Add a Sorting Feature to Your Search Bar
In this section, you’ll add the Sorting component or sorting functionality to the Sajari search bar.
Update the div containing ResultsPerPage and ViewType components in the src/App.js file:
In the above code, you pass different options to sort the result in the options prop of the Sorting component. The options prop takes in an array of objects with a pair of name and value in the sort field. In the object, the name is the text displayed on the UI, and the value is the sorting parameter.
For example, { name: "Most relevant", value: "" } is the default response from Sajari. But { name: "Brand: A to Z", value: "brand" } sorts the response alphabetically, based on the brand of the product. To reverse this order, you can pass a negative sign along with the sorting value.
To sort based on the name of the product, you can add { name: "Name: A to Z", value: "name" } to the above options prop.
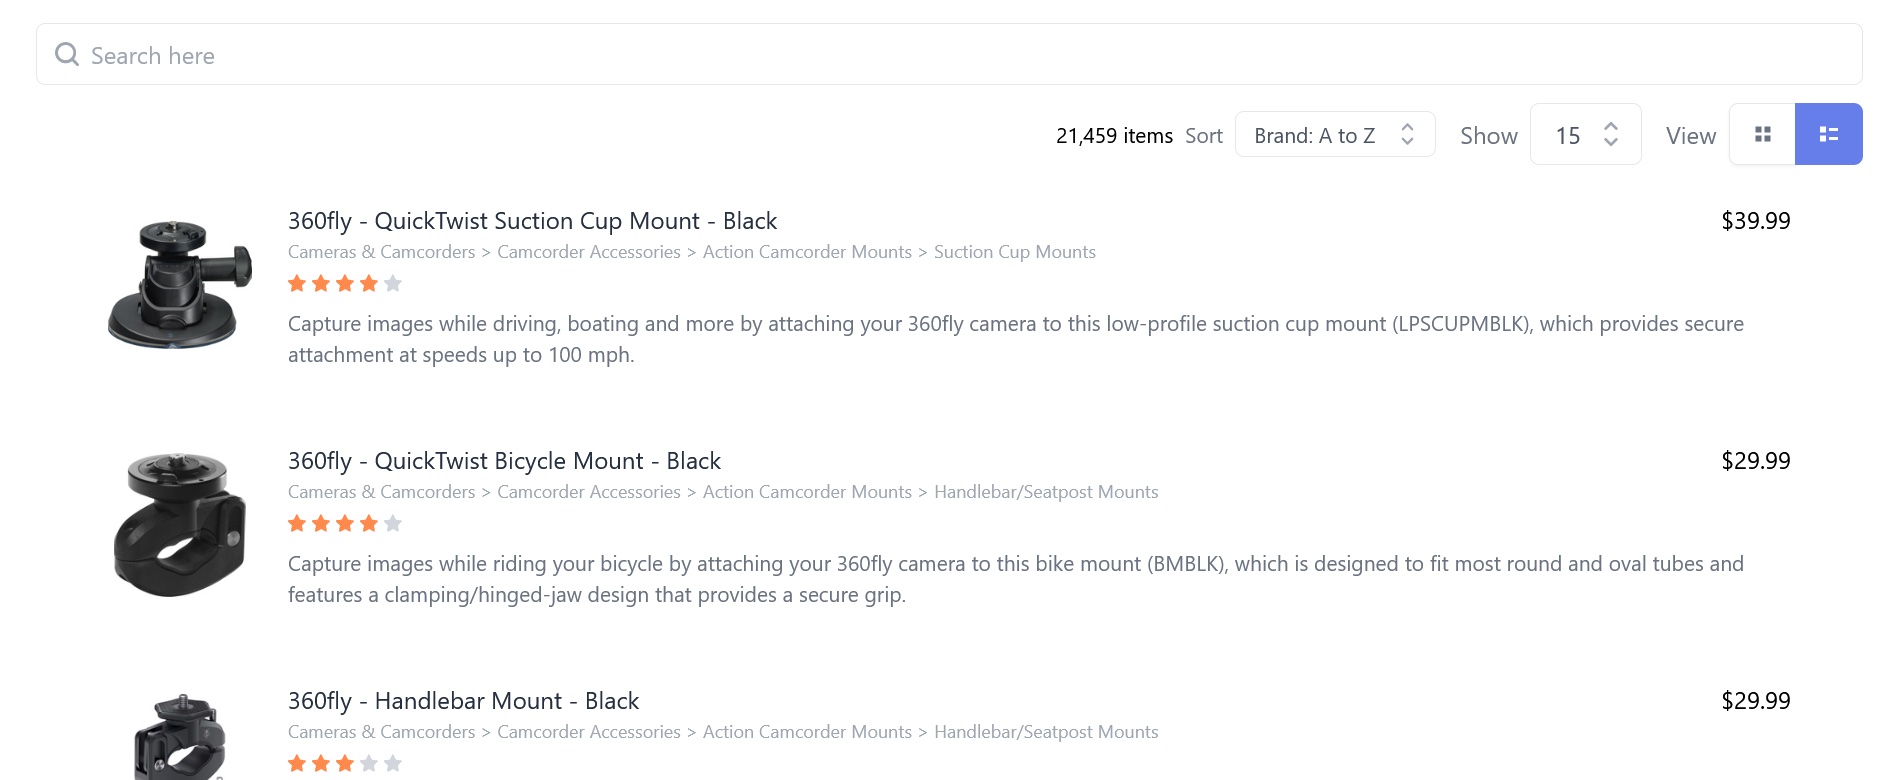
The following image highlights the response, sorted based on the brand name alphabetically from A to Z:
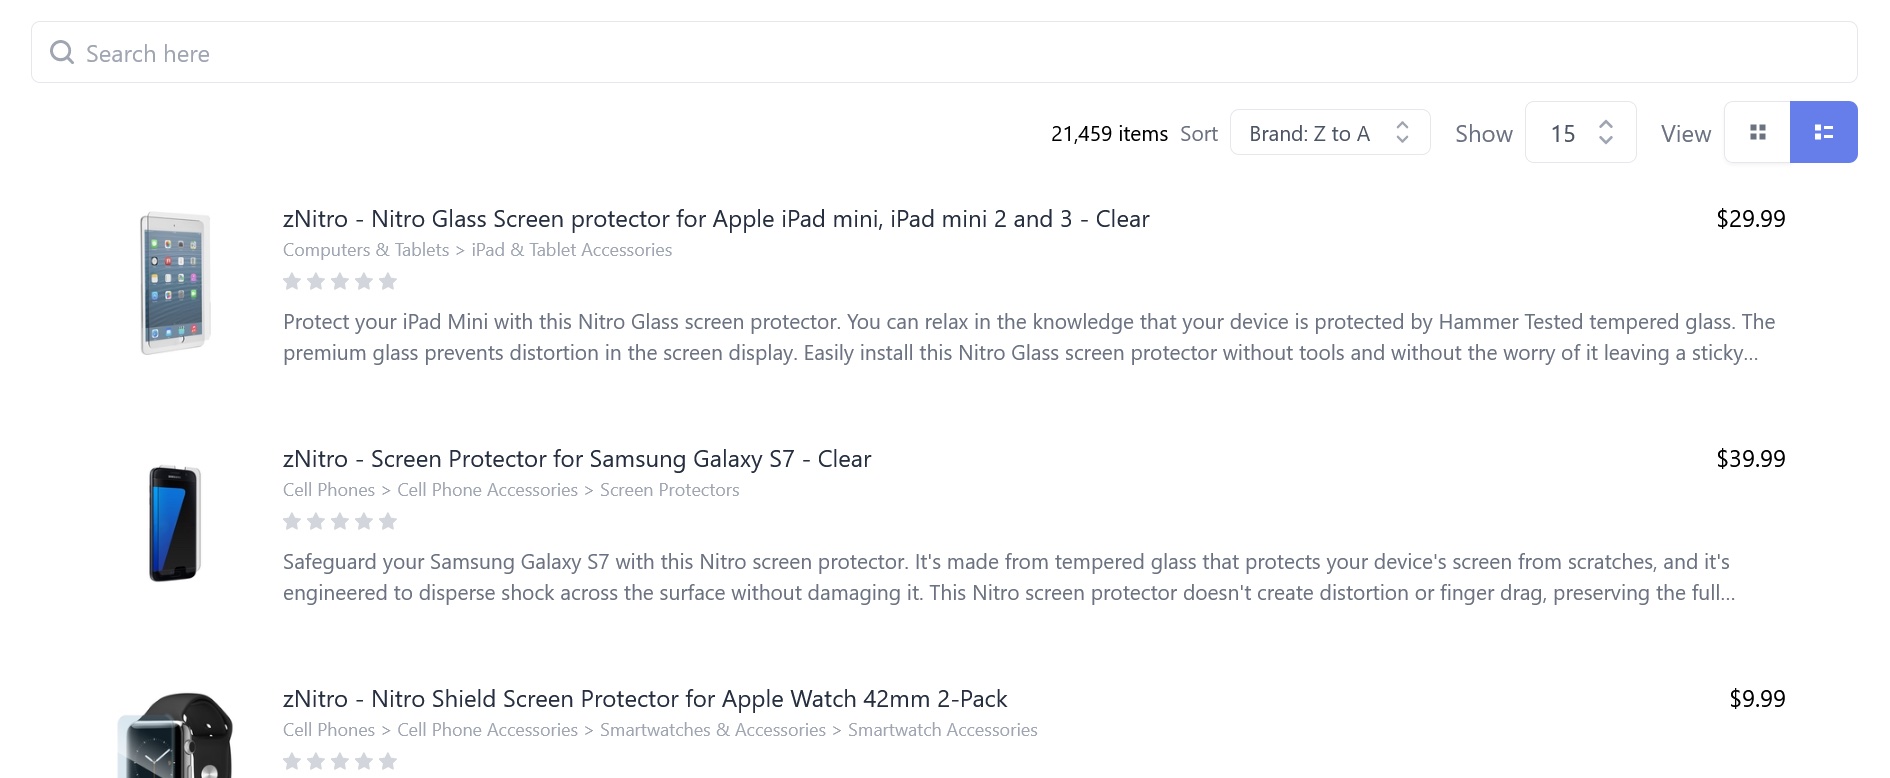
The response in the following image is sorted based on the brand name alphabetically from Z to A:
How to Add a Filtering Feature to Your Search Bar
In this section, you will add the Filter component to refine the search functionality in your application. Filters are typically located in the sidebar of a webpage, but you may find them along the top, too. (Check out Sajari’s article on search facets and filters for more ideas.)
Update the src/App.js file:
In the above code, you’re first creating a new brand filter. This filters results based on the brand selected using the FilterBuilder class. The FilterBuilder class is used to construct filters for use with the relevant SearchProvider. You can read more about this class here.
You can also pass the type of filter in the above code: a list, color, rating, tabs, range, or select. The default is list type—this is used for the brand filter.
Next, update the SearchProvider component so this filter bypasses brandFilter in the filters prop:
Finally, create a new div to render the Filter component above the Result component code:
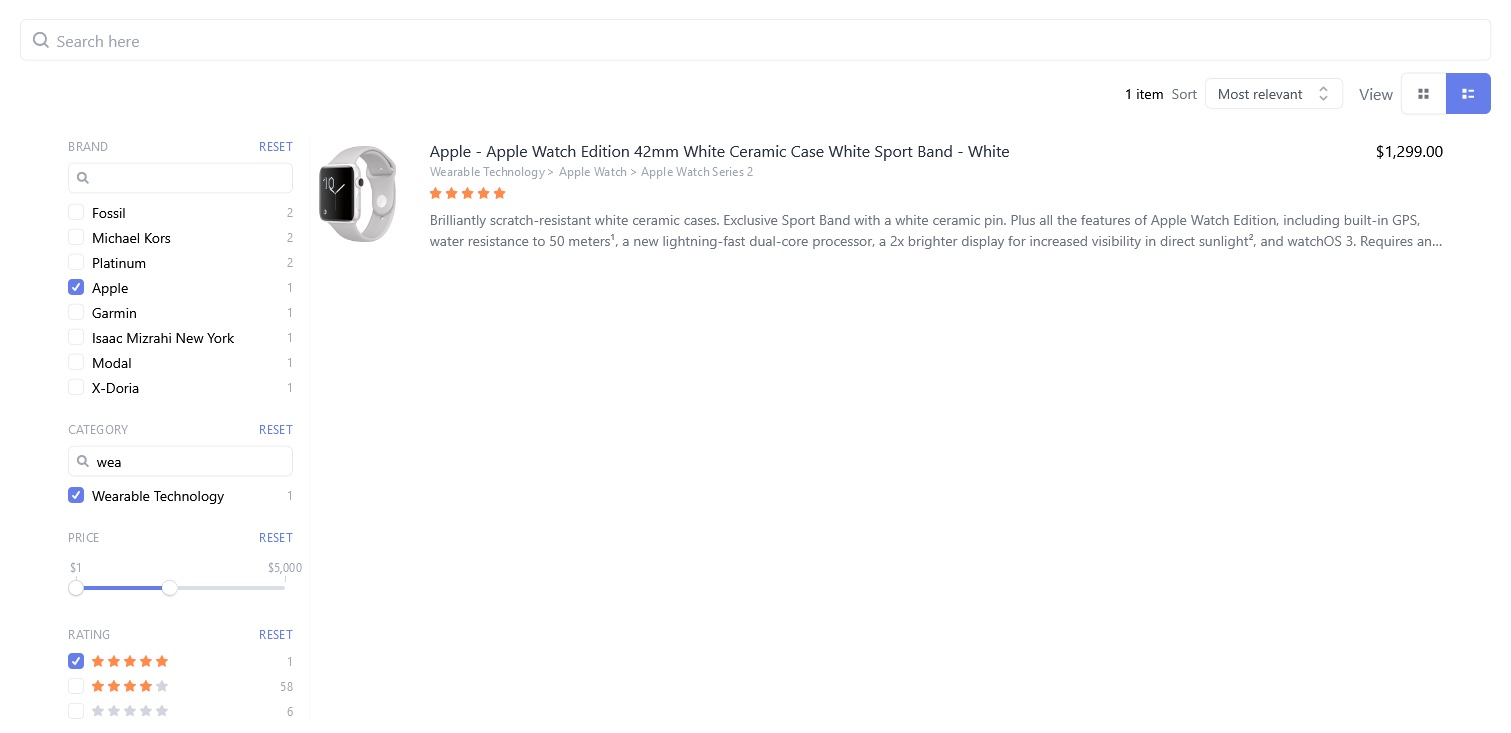
This is how your app should look:

You can also create other filters like categoryFilter, colorFilter, priceFilter, ratingFilter, etc. by using the FilterBuilder class. The RangeFilterBuilder class is used instead of the FilterBuilder class to create a range filter, such as price range.
Update the src/App.js file:
Your app should look like this:
Conclusion
In this tutorial, you learned how to integrate Sajari React Search UI with any React application seamlessly, as well as how to add sorting and filtering functionality to your search bar. You also understand the overall importance of a well-designed search box to a positive user experience.
This article only touched the tip of the iceberg about web design for a search bar. Other considerations and search features you will want to consider for selecting a custom search engine include:
- Instant indexing: Building a search index and using a crawler or APIs for re-indexing on new content changes
- Machine learning: AI such as reinforcement learning to improve search results based on conversion and click data
- Search query parsing: Includes stemming, natural language processing, and typo tolerance in the search form
- RESTful services: Enables integration of your search box and search engine with other backend services
Here are some additional Sajari resources that can help:
Lastly, here's how it looks when it all comes together:
About the Author
Ashutosh K. Singh is a writer, learner, and JavaScript developer who enjoys writing articles that help people. You can follow him on Twitter.

.jpeg)
